|
JeVois
1.23
JeVois Smart Embedded Machine Vision Toolkit
|
|
|
JeVois
1.23
JeVois Smart Embedded Machine Vision Toolkit
|
|
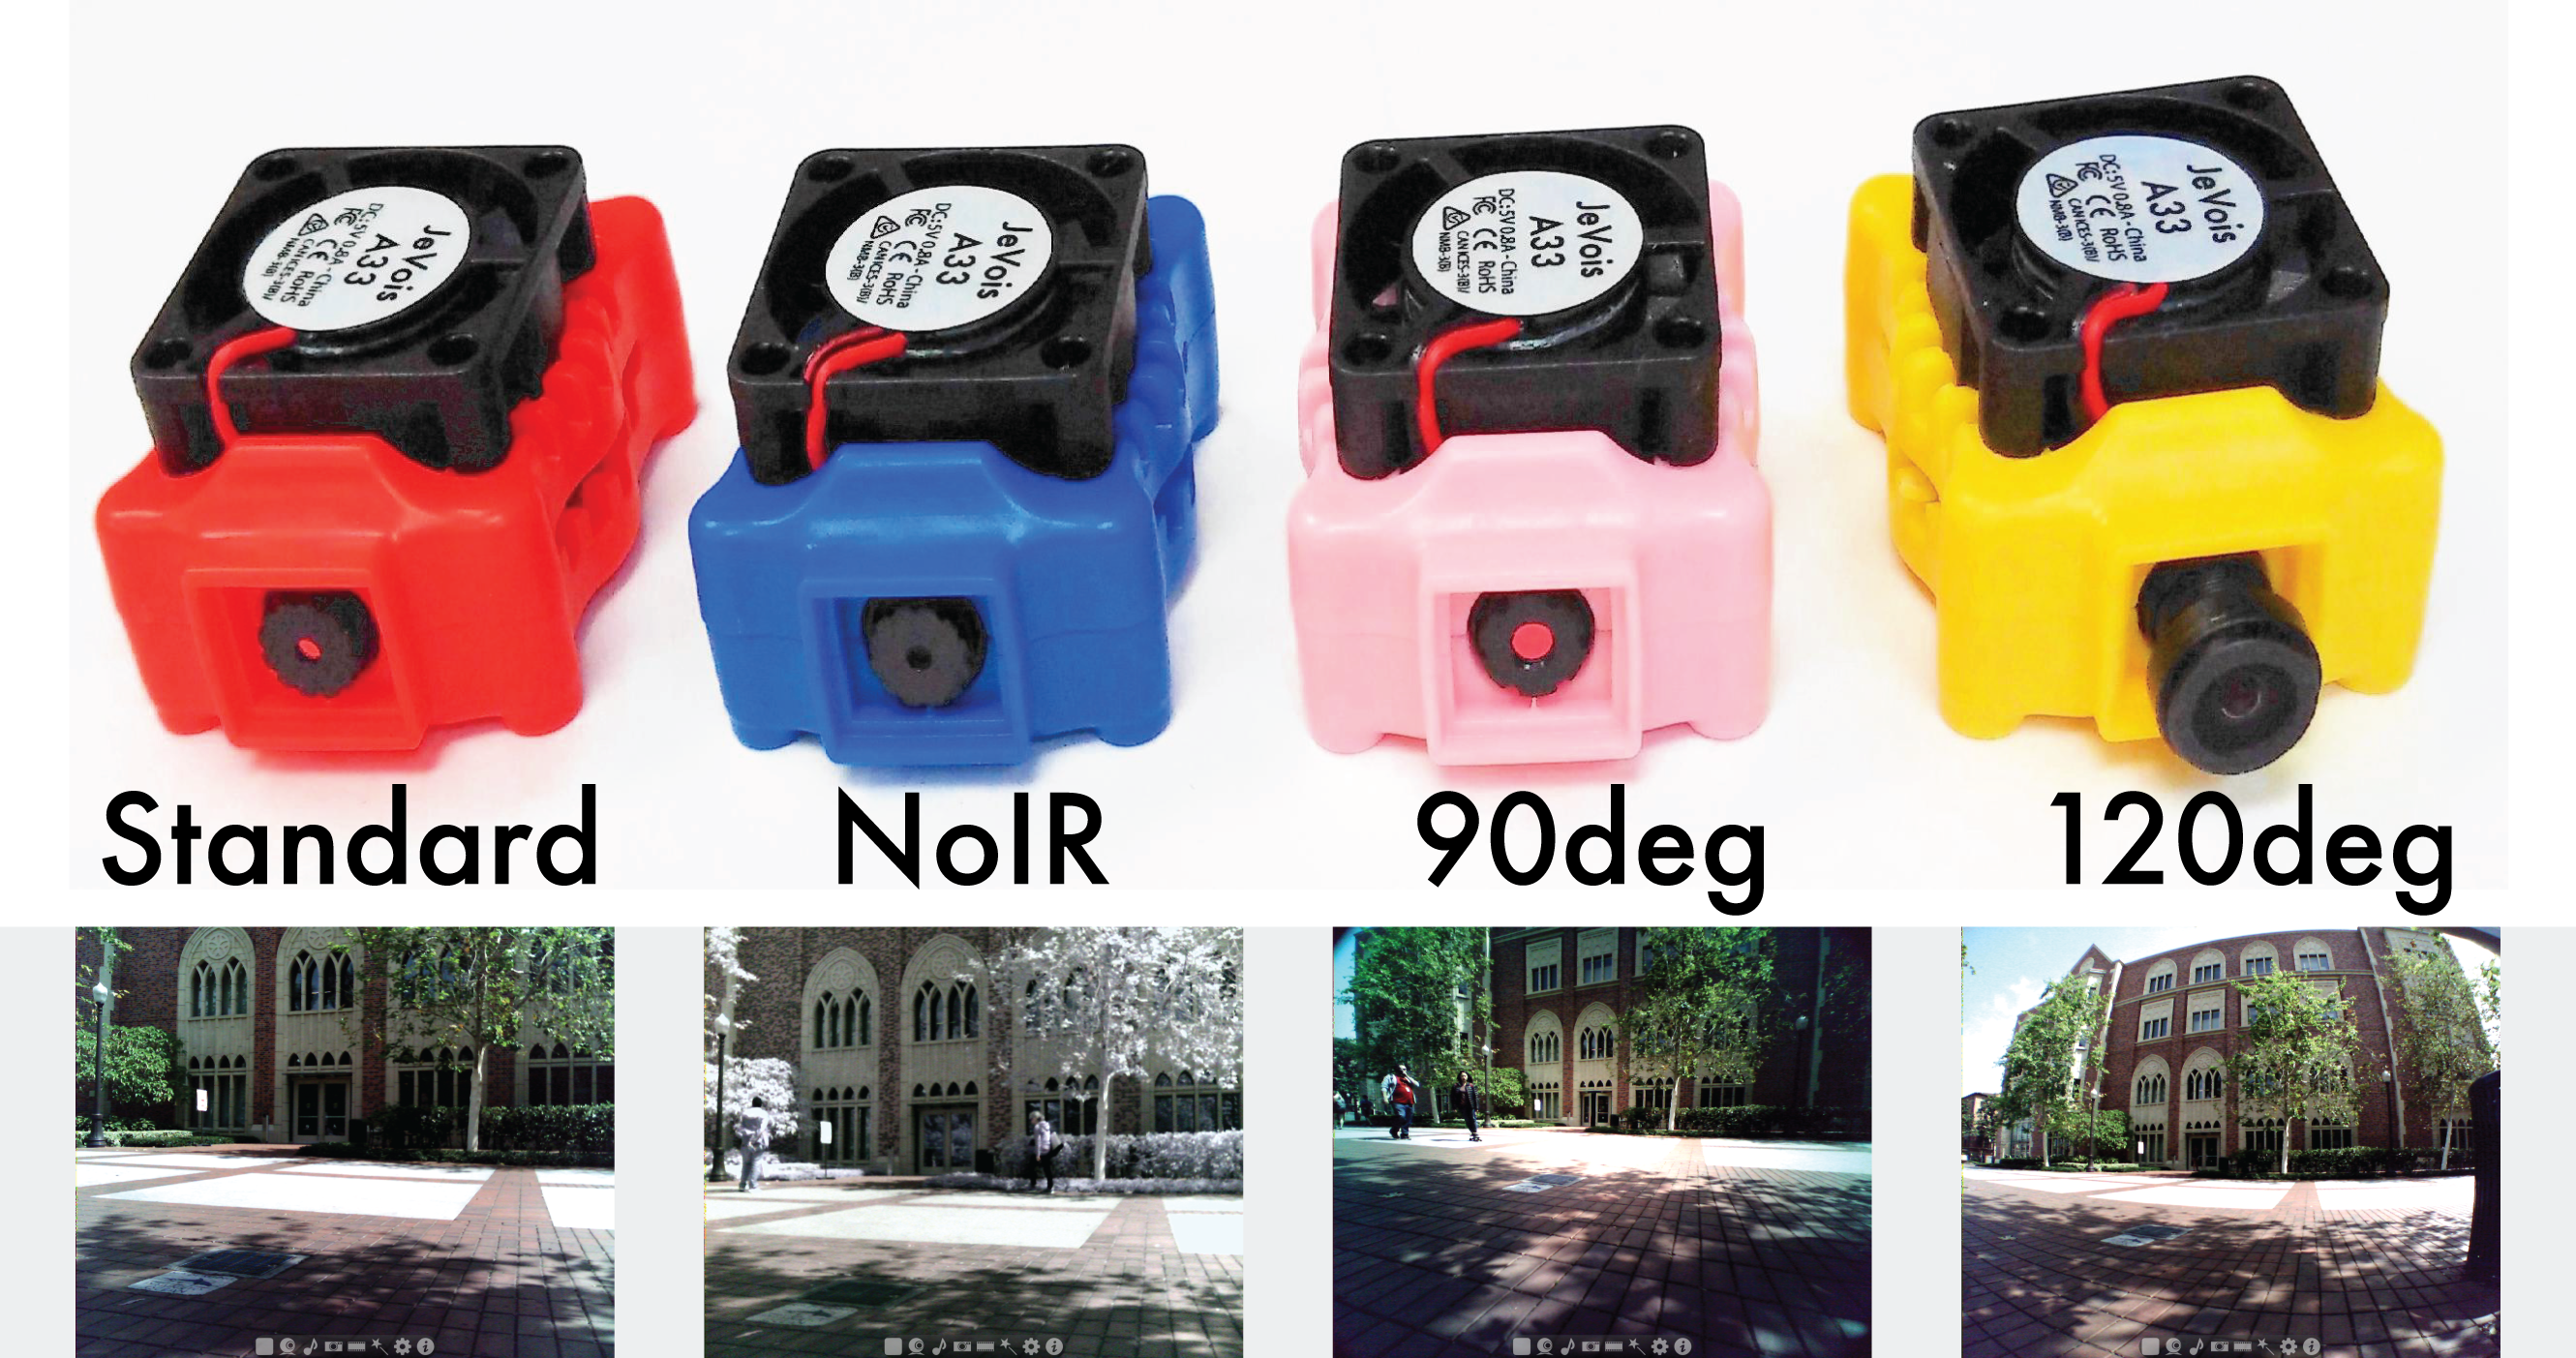
As of April, 2018, several different lens options are available for JeVois-A33:

Click here for a larger version of the above image.
Below is a quick comparison:
| Lens | Horizontal field of view | Infrared-cut (IR) filter | Adjustable focus |
|---|---|---|---|
| Standard | 60 degrees | Yes | No (dot of glue on threads) |
| NoIR | 60 degrees | No | Yes |
| 90deg | 90 degrees, no distortion | Yes | Yes |
| 120deg | 120 degrees fisheye | Yes | Yes |
An infrared-cut (IR-cut) filter blocks infrared light so that the sensor only receives visible light. This ideal for daytime use. The NoIR lens with no such filter is ideal for nighttime use. You would then need to provide an infrared light source (typically, an array of infrared LEDs), which can illuminate your scene using a wavelength of light that is invisible to the human eye. In this way, JeVois can still "see", thanks to the reflected IR light, even in what appears to humans to be complete darkness. Many security cameras use this feature to provide nighttime monitoring.
A no-distortion lens features a broader field of view, but with very little spatial distortion of the image, so that straight lines in the world are seen as straight lines in the video captured by the camera.
In contrast, very wide-angle fisheye lenses suffer from so-called barrel distortion, named because an array of vertical lines will be imaged by the camera as curved, as if on the surface of the barrel. This is the flip-side of getting a much wider field of view with fisheye compared to conventional lenses. JeVois provides an algorithm for the correction of barrel distortion, which runs on the GPU inside JeVois, see JeVois module DemoGPU for example.
Note that for all except the standard lens, the lens has been adjusted at the factory for a focusing distance of 30cm to infinity. In addition, we asked the factory to NOT glue the lens once focused. So, you will be able to easily change focus by simply turning the lens. Once you have found your optimal setting, you should fix the lens using a small drop of glue, paint, nail polish, etc on the thread (as was done with the standard lens pre-installed in JeVois).
These sensors and lenses are available at https://jevoisinc.com
Special JeVois units with no lens glue and either ov9653 or ov7725 sensors are available at https://jevoisinc.com
These units come in a kit with the standard lens installed, and extra 90deg, 120deg, and NoIR lenses.

This requires some skills but can be done in less than 5 minutes. See the video below for full details.
In some situations, it may also be useful to use corrective lenses placed in front of the standard lens. For example, one may want to achieve microscopic accuracy, or one may want to read small text, or one may just need to focus onto objects very close to the camera.
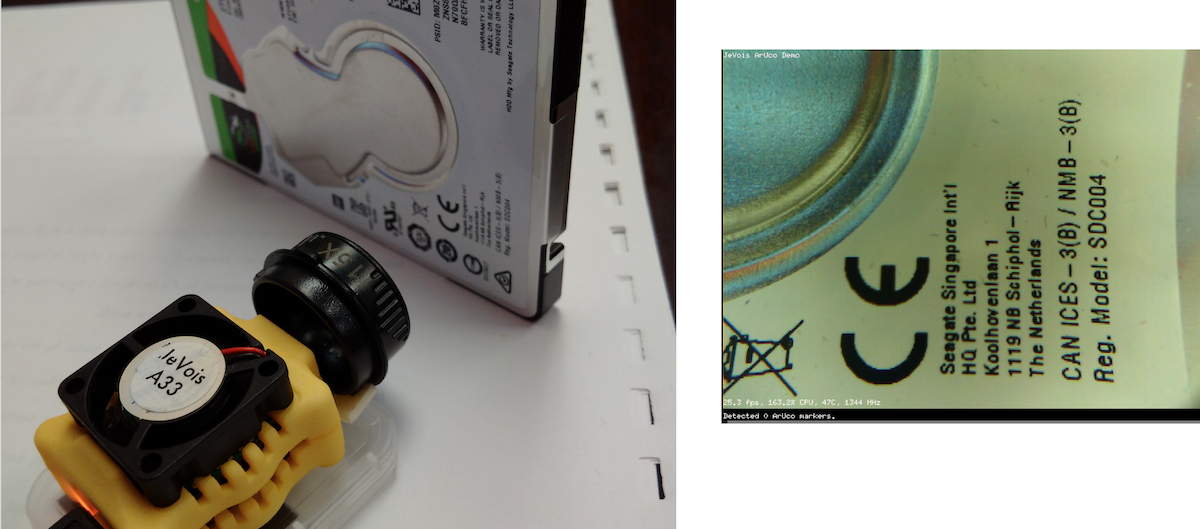
Above is an example using a 15x lens taken from a pair of jeweler glasses that had interchangeable lenses. Using this corrective lens (which was not very well aligned in this example, hence the distortions), we can focus well on the tiny text of that 2.5" hard drive, at a very short distance from JeVois.
Different lenses have different amounts of shading with eccentricity. The JeVois camera sensor chip provides some low-level register settings to help improve image uniformity with different lenses. If you are using some of the custom lenses in your JeVois camera, read on.
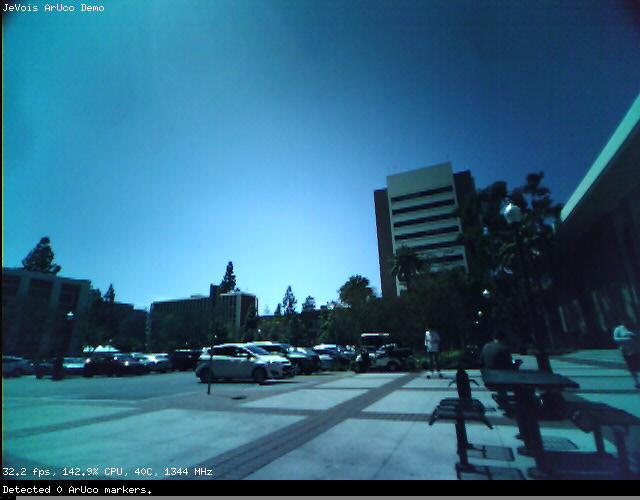
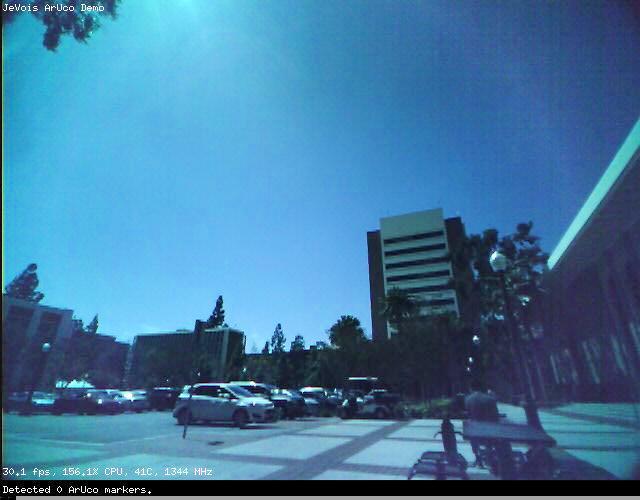
Here is an example of using the 90deg no-distortion lens with the default settings, which are for a 60deg lens. Observe how the image gets darker near the corners of the frame:
Adjustment for lens shading is achieved by applying some positive gain which increases with eccentricity (distance from the image center), and which is applied outside a central no-correction disk. The diagram below shows the center of the correction zone, and the central no-correction disk (names center area of the image):
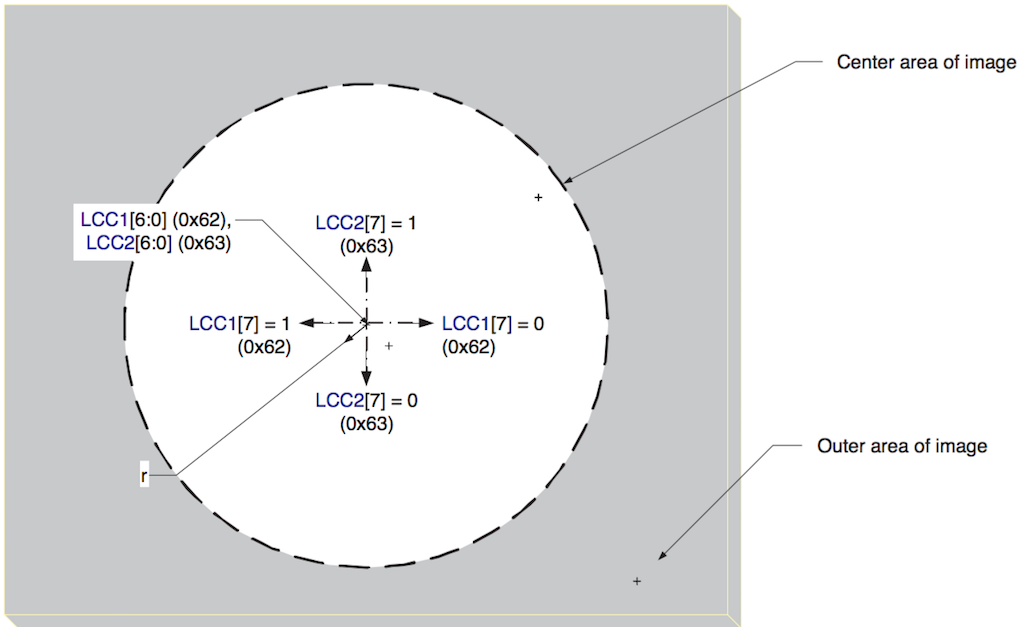
Camera registers LCC1 (0x62) and LCC3 (0x63) allow one to adjust the location of the correction disk, by specifying an offset (in the direction specified by bit 7 of each register, and with a magnitude specified by the remaining 6 bits) from the sensor's center point.
Here are all the relevant registers:
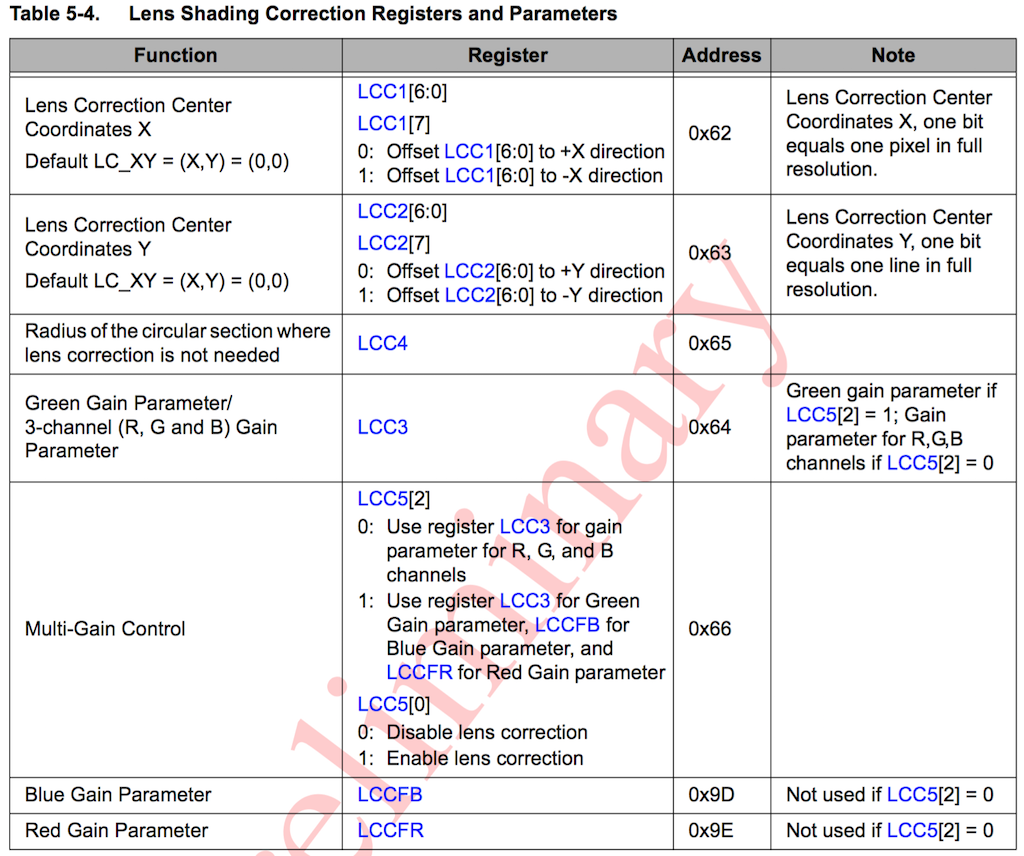
Notably, register LCC3 (0x64) sets the gain (strength of correction) and LCC4 (0x65) sets the radius of the central no-correction disk. Instead of a single gain parameter, one can also instead, through register LCC5 (0x66) specify 3 different gains for Red, Green, and Blue (then using registers LLC3 (0x64) for green, LCCFB (0x9d) for blue, and LCCFR (0x9e) for red).
Below is a simple python program that will allow you to interactively adjust the radius of the no-correction zone, and the single gain factor for RGB:
Playing with this code you should be able to improve the uniformity of the image, but note the caveats below. Make sure that you have write access to the serial-over-USB device before you run this python code (e.g., sudo chmod 777 /dev/ttyACM0, or run the python program as root).
You may want to adjust the code to obtain different effects. The key elements here are:
setpar camreg true to JeVois, to enable access to low-level sensor registers.setcamreg REG VAL where REG is the register address and VAL is the value. The setcamreg command can understand decimal, octal (if starting with a leading 0), and hexadecimal (if starting with a leading 0x) register addresses.Once you have found good settings for your particular lens, you may want to issue these commands at camera start time, by placing the commands in initscript.cfg on your microSD card.
 1.9.8
1.9.8
