|
JeVois
1.23
JeVois Smart Embedded Machine Vision Toolkit
|
|
|
JeVois
1.23
JeVois Smart Embedded Machine Vision Toolkit
|
|
The easiest to get started is to use JeVois-A33: JeVois Inventor graphical user interface
Below are alternative approaches.
The JeVois smart camera is used like a regular USB camera. To get started with a Linux host computer:
Download a disk image from http://jevois.org and flash it to a MicroSD card.
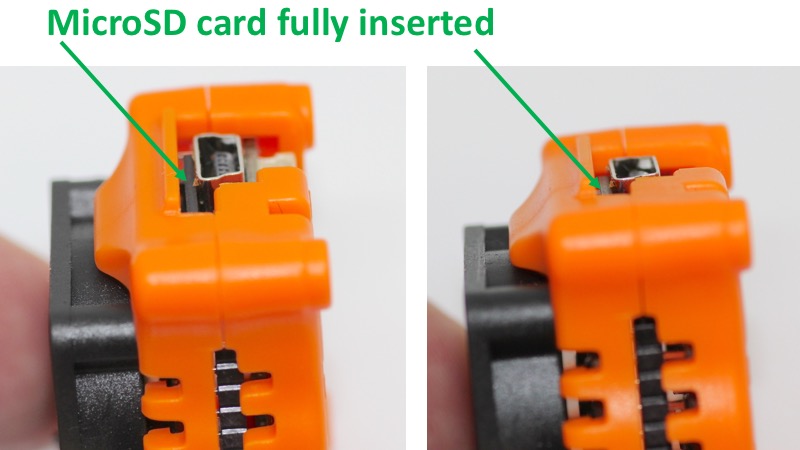
Insert MicroSD card into JeVois smart camera, with the MicroSD contacts pointing up as shown below.

Connect camera to a host computer. The smart camera requires up to 3.5 Watts of power, which is above the limit of what a single USB 2.0 port is designed to supply, but is within the limits of a single USB 3.0 port. It is important to use a high-quality USB-to-miniUSB cable that can carry that full power without loss. Look for a cable with 24awg power wires. It is recommended that you use a USB 3.0 port on your host computer, as those provide more power. If that is not available, you can use a USB Y-cable to connect to two USB 2.0 ports on your host computer, or to one USB 2.0 port and one external USB power supply (e.g., phone charger). Make sure that you do not use a USB hub, unless that hub has a strong external power supply (transformer, wall adapter).
Observe the LED on the smart camera next to the USB connector:
Start a video capture software. Try guvcview (may need 'sudo apt-get install guvcview' or use your Linux package manager to find and install guvcview)
When using guvcview for the first time, it may hang trying to open the sound device on your host computer. To avoid this, start guvcview the first time from a Linux terminal, like this:
sudo apt-get install guvcview
guvcview -ao none -f YUYV -x 640x360 # On Raspberry Pi host, use '-a none -o none' instead of '-ao none'
guvcview will remember to not try to use sound (-ao none) next time you open it. Next time you can start it from the Ubuntu menu without requiring a terminal.
guvcview provides a great graphical user interface but does not work for all pixel formats. Sometimes it also crashes when changing pixel formats (e.g., from MJPG to YUYV). An alternative is to use ffplay (may need 'sudo apt-get install ffmpeg' or use your Linux package manager to find and install ffmpeg)
ffplay can display all pixel formats supported by JeVois and will reject a format if it does not exactly match what the hardware supports. Example:
sudo apt-get install ffmpeg
ffplay /dev/video0 -pixel_format yuyv422 -video_size 640x300
The pixel_format values supported by JeVois are (see User guide to video modes and mappings for more information): 'yuyv422' for YUYV, 'gray' for GRAY, 'rgb565' for RGB565, 'mjpeg' for MJPG, 'bgr24' for BGR24, and 'bayer_rggb8' for BAYER.
Note that on Raspberry Pi 3, display framerate may be slow, especially if you are in power saving mode (small yellow lightning bolt shows up in top right corner of the screen, indicating that power supply is too weak to allow the Pi to run at full speed). Make sure you use a strong USB charger to power your Pi (e.g., with 2.1A output). The Raspberry Pi is just a little too slow for real-time video capture and display. Use of a faster Linux desktop computer is recommended for optimal video performance.
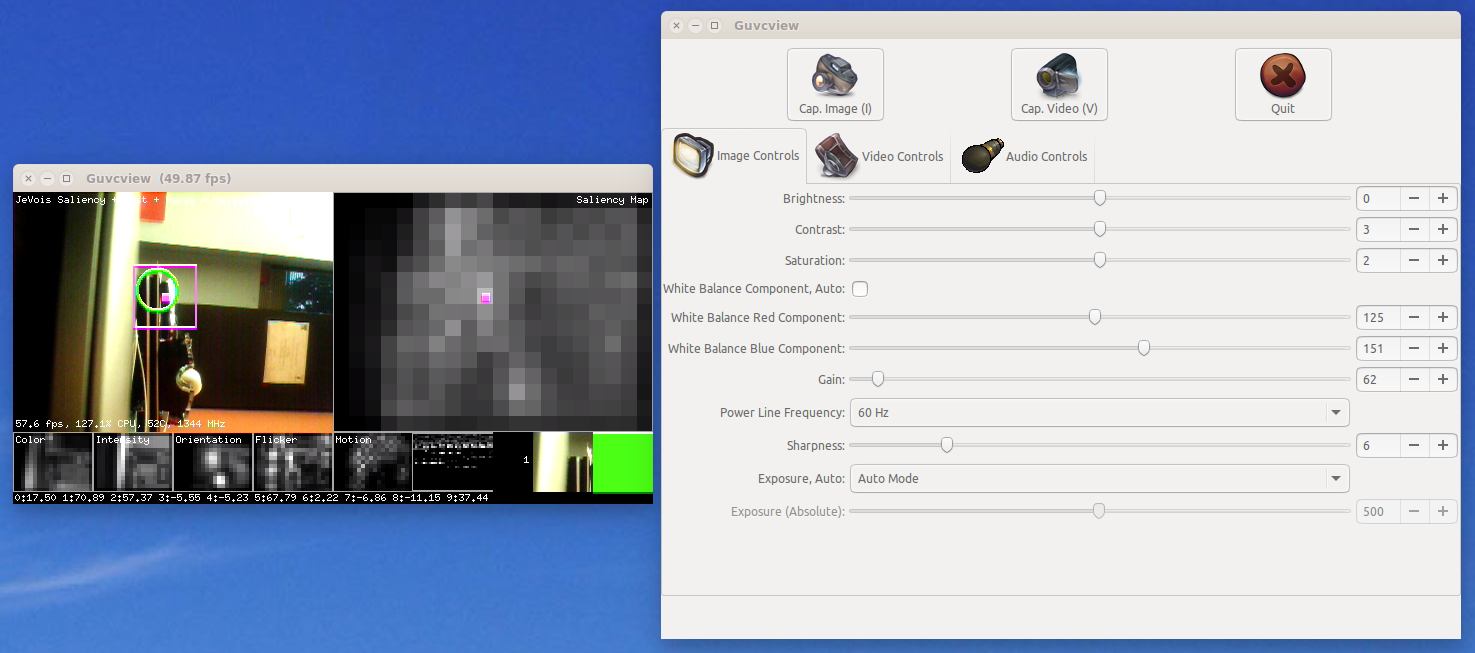
Feel free to play with the controls (brightness, contrast, etc). They should all work in guvcview. Remember that some controls are dependent over other controls, as in any USB camera. For example, "Exposure (Absolute)" will remain greyed out until you turn "Exposure, Auto" to "Manual Mode".
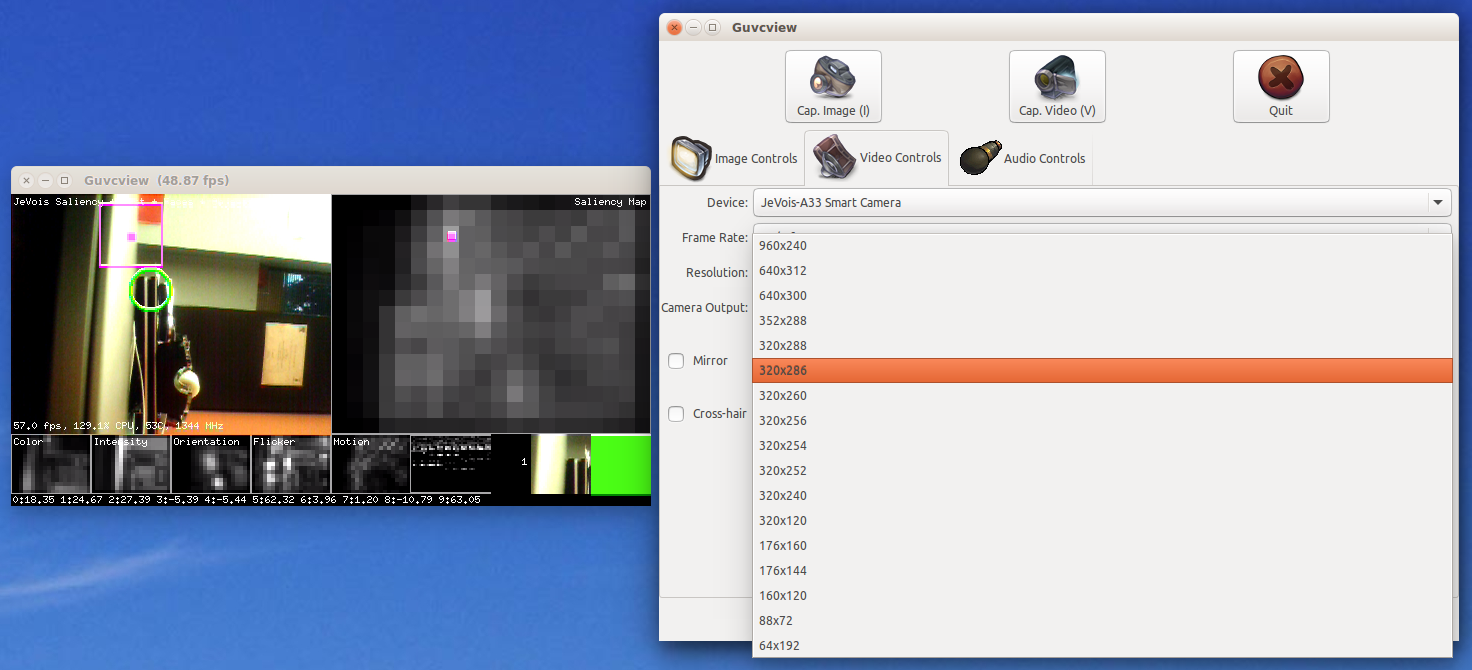
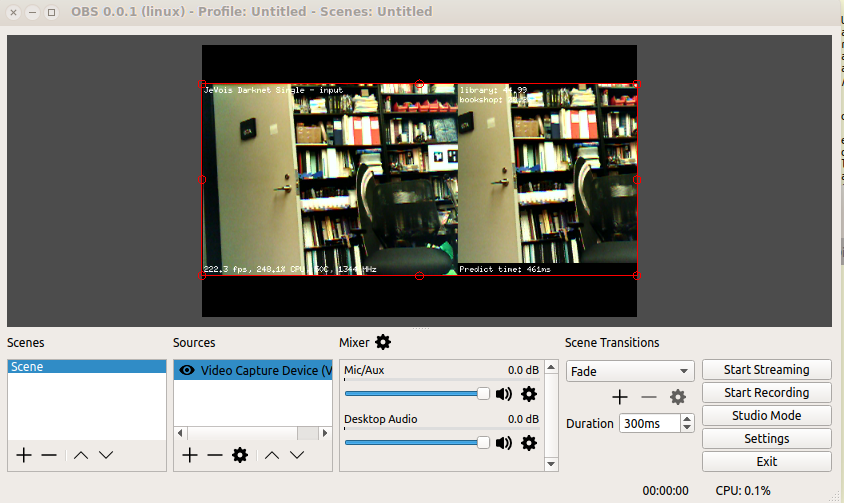
Selection of different machine vision algorithms is achieved by selecting different video resolutions in your video capture software. For example, in guvcview, first click on the "Video Controls" tab, then on the "Resolution" pull-down menu:
Make sure you quit your camera viewing software before you unplug your JeVois smart camera. Otherwise your host computer may become awfully confused trying to use a camera that does not exist anymore.
No shutdown procedure is needed before powering off your JeVois camera. Just close your video capture software and unplug the camera.
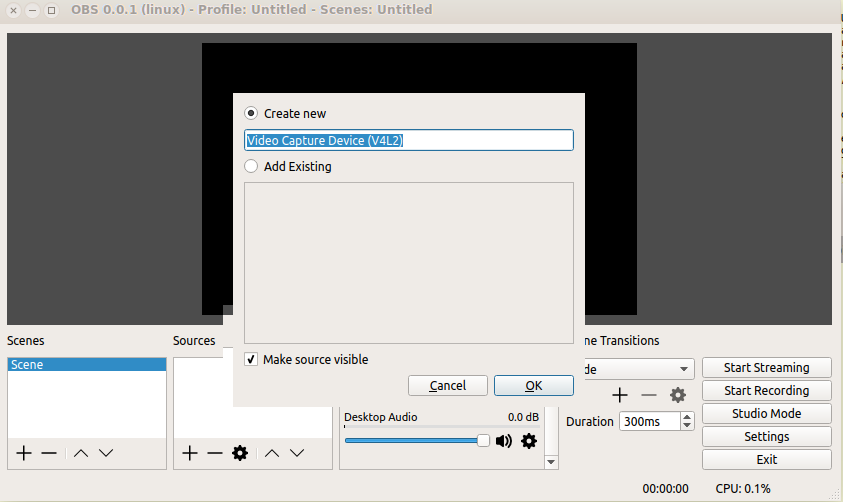
Open Broadcaster Studio is another great free program that allows you to select different video resolutions, as needed by JeVois.
sudo apt install obs-studio
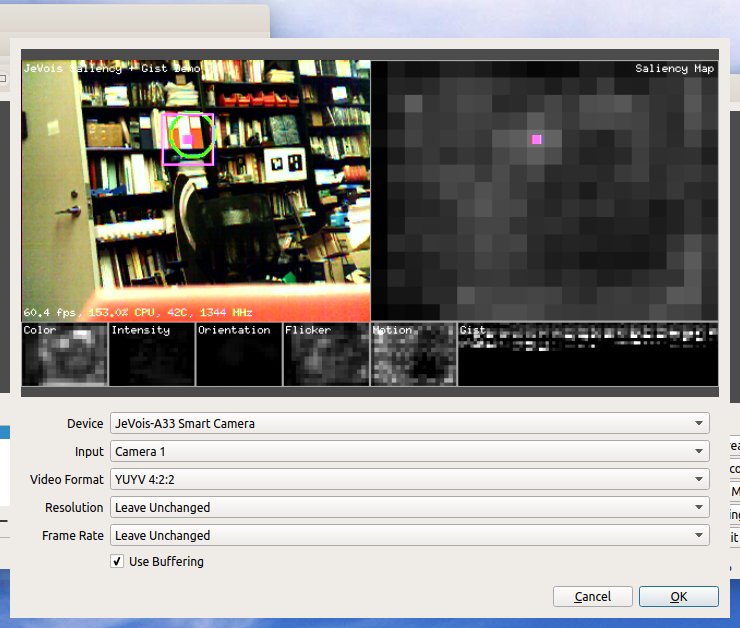
obs in a terminal or find in in the Ubuntu menu), towards the bottom left of the screen, click the + icon under Sources to add a new video capture device (V4L2). 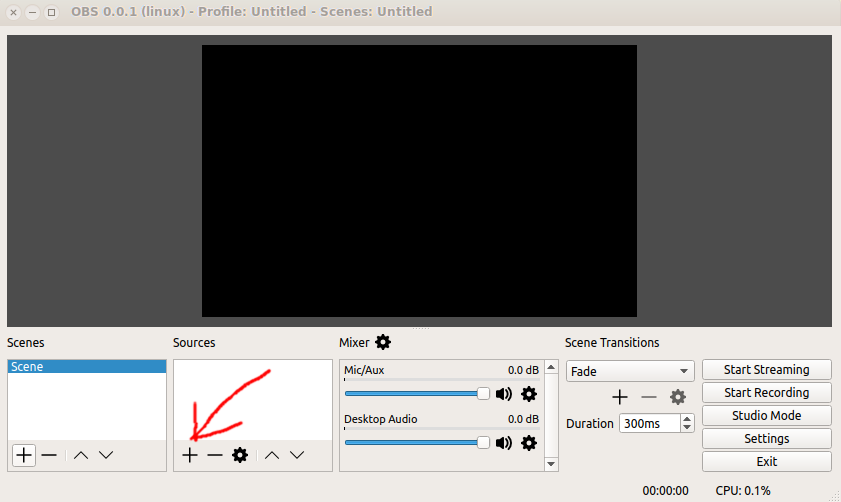

If things are not working right, try to type dmesg in a Linux terminal and observe towards the end of what is printed. You should see something like this:
[...]
[4768736.704777] usb 1-1.3: new high-speed USB device number 13 using xhci_hcd
[4768736.809464] usb 1-1.3: New USB device found, idVendor=1d6b, idProduct=0102
[4768736.809470] usb 1-1.3: New USB device strings: Mfr=1, Product=2, SerialNumber=0
[4768736.809473] usb 1-1.3: Product: JeVois-A33 Smart Camera
[4768736.809476] usb 1-1.3: Manufacturer: JeVois Inc
[4768736.847915] uvcvideo: Found UVC 1.00 device JeVois-A33 Smart Camera (1d6b:0102)
[4768736.849892] input: JeVois-A33 Smart Camera as /devices/pci0000:00/0000:00:1c.6/0000:09:00.0/usb1/1-1/1-1.3/1-1.3:1.0/input/input29
[4768736.851499] cdc_acm 1-1.3:1.2: ttyACM0: USB ACM device
If not, see below.
guvcview does not detect the JeVois smart camera
Possible causes include:
sudo killall -9 guvcviewand then try to connect your JeVois camera again.
guvcview shows video from another camera (for example, built-in camera on a laptop)
You can either use the pull-down menus in guvcview to select your JeVois camera (click on "Video Controls" tab, then "Device" pull-down menu), or start guvcview like this
guvcview -d /dev/video1
On Linux, the first connected camera is /dev/video0, the next one is /dev/video1, and so on.
I would like to start in a particular vision mode but when guvcview starts, it just uses the last mode I had selected previously
You can tell guvcview to start in a particular mode, for example
guvcview -ao none -f YUYV -x 640x312 # On Raspberry Pi host, use '-a none -o none' instead of '-ao none'
Will start the saliency + faces + object recognition demo.
 1.9.8
1.9.8
