It is highly recommended that you use a virtual machine software to create a fresh installation of Ubuntu into which you will install the JeVois development environment. This way, you will not encounter problems with differemt versions of packages required by JeVois and by possibly other applications you run on your desktop and laptop.
Here are summary instructions on how to do this with the free Virtualbox software:
- Download and install Virtualbox from https://www.virtualbox.org/wiki/Downloads (get the version for your current computer, which is called the host computer, e.g., if using a Mac, get the version for OS X host).
- Download and install the corresponding VirtualBox Oracle VM VirtualBox Extension Pack, making sure that the version of the extension pack matches exactly the version of Virtualbox you installed.
- IMPORTANT: you must restart your computer for the installation to work properly later on. Especially for Mac users, it is unusual to have to reboot your mac, but you need to do it here otherwise video capture will likely not work later on.
- Create a new virtual machine: select Linux 64-bit OS, allocate as much RAM and CPU as is reasonable (usually, move the sliders to the point where they become red), and create a new virtual hard drive, using the VDI method and selecting at least 50GB size.
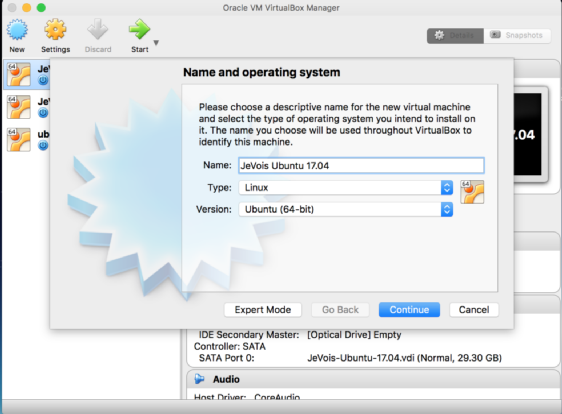
Above: creating a new virtual machine
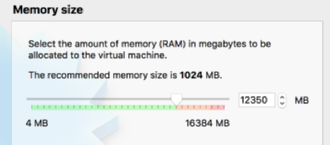
Above: setting memory size
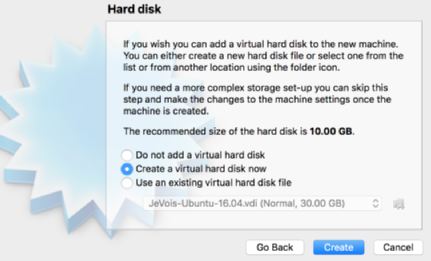
Above: Creating a virtual hard disk
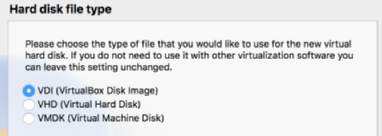
Above: Selecting VDI hard disk type
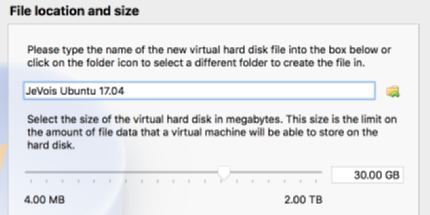
Above: We recommend setting VDI size to at least 50GB for JeVois-A33 and 150GB for JeVois-Pro
- Get Ubuntu 20.04 Desttop amd64 iso file from https://www.ubuntu.com/download/desktop
- Start your virtual machine. Because it has no operating system yet, you will be asked to provide an iso file, select the Ubuntu iso you just downloaded.
- Install Ubuntu. Make sure you allocate the whole virtual disk to a single root partition (this is the default when asked how to format the disk), so that there is plenty of room in the root partition.
- After Ubuntu is installed, you can start it, open a terminal, and proceed with the installation of the JeVois SDK as detailed in JeVois Ubuntu packages and source code repositories and in the programmer setup tutorial.
- To be able to grab video, go to the settings of your virtual machine (yellow cog-wheel in the main panel of Virtualbox) and make sure that you enable USB 2.0 or USB 3.0 under Ports, USB. Then plug-in a USB camera, and add a device filter for it (click the icon with the + sign on top of a USB connector). We recommend that you then restart your virtual machine and your host.
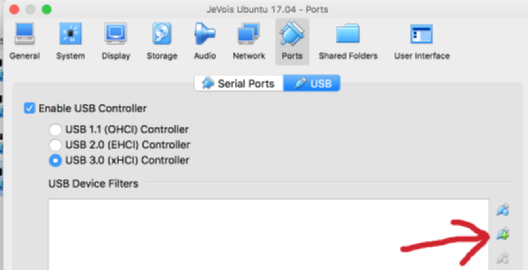
Above: adding a USB filter
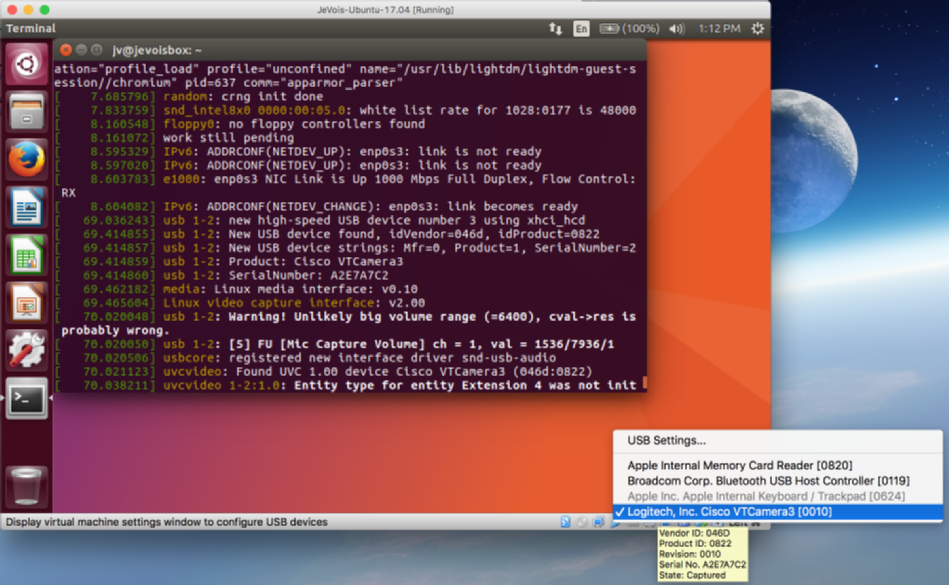
Above: you can also enable a connected USB camera using the little USB connector icon at the bottom of your virtualbox screen.
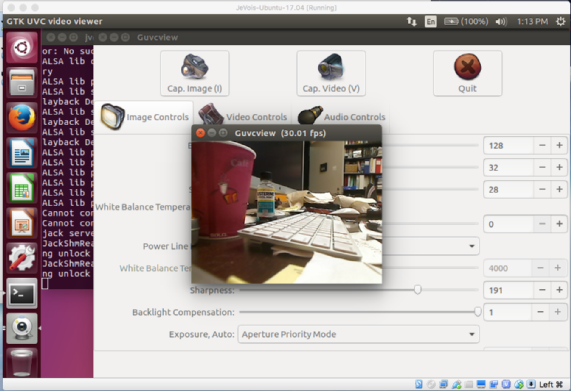
Above: guvcview working inside virtualbox
Headless VirtualBox
When using a Linux host, it is often more convenient to just run the JeVois SDK virtual machine in a terminal, without the whole graphical interface. This allows you to simply copy/paste commands from another terminal to the one that runs your virtual machine. You cannot run jevois-inventor in that headless machine, so this is more for C++ development and compilation.
To enable headless mode, you need to enable an SSH port forwarding rule on your virtual machine, as follows:
- in a terminal on your host machine, create a key with empty password, if you do not already have one:
ssh-keygen -t rsa
When prompted for a passphrase, just press ENTER.
- on the virtual machine, install openssh-server:
sudo apt install openssh-server
in VirtualBox, select Settings for your virtual machine, then Network, click on Advanced, and then Port Forwarding. Click on the little icon with a green plus sign to add a rule, as follows:
- name: ssh
- protocol: TCP
- Host IP: leave blank
- Host port: 3000 (or any unused port over 1000)
- Guest IP: leave blank
- Guest port: 22
And click Ok. This will forward connections made to your host machine on port 3000 to the virtual machine port 22 (ssh).
- Copy your key from the host to the virtual machine:
ssh-copy-id -p 3000 jevois@localhost
When asked, type password jevois
- You can now shutdown your virtual machine and close VirtualBox.
To start the virtual machine headless and log into it:
  VBoxManage startvm UbuSdk2004 --type headless
  sleep 20
  ssh -p 3000 jevois@localhost
Replace UbuSdk2004 above by the name you have chosen when creating your virtual machine (this is the name that appears on the sidebar with the list of machines in the VirtualBox graphical interface).
All done, you should now be logged into your virtual machine. Remember to shut it down with sudo shutdown -h now when finished.
 1.9.8
1.9.8
