|
JeVois Tutorials
1.23
JeVois Smart Embedded Machine Vision Tutorials
|

|
|

Loading...
Searching...
No Matches
|
JeVois Tutorials
1.23
JeVois Smart Embedded Machine Vision Tutorials
|
|
|
Camera calibration consists of determining essential parameters of the optics and of the sensor. Once a precise calibration is achieved, modules such as DemoARtoolkit can recover the exact location and orientation of a marker in 3D space.
JeVois includes a set of default calibration files for the standard sensor and optics.
You should consider running a calibration if:
Note that calibration is dependent on image resolution. So the procedure described here should be repeated for every video resolution which you intend to use.
Start with a fresh Ubuntu 16.04 virtualbox.
Follow the instructions at http://jevois.org/doc/Virtualbox.html but with Ubuntu 16.04. Beware: you may have problems compiling ARtoolkit with later versions of Ubuntu.
Make sure you reboot your host and install the USB device filter. You should get to the point where you can see video in guvcview when you connect your JeVois camera.
We will compile ARtoolkit5 natively in our virtual machine.
We follow the instructions at https://github.com/artoolkit/artoolkit5
The program we will use should now be ready in bin/calib_camera
The camera calibration will just select the default video mode from the camera.
To make sure the particular resolution is selected, edit videomappings.cfg on your JeVois camera to have only one mode. For example, using JeVois Inventor, go to the Config tab and select videomappings.cfg, then select all (CTRL-A) and delete (DEL) and finally just add one Pass Through mode. For example, to calibrate a modified JeVois camera using an optional 2MP OV2640 sensor at 1280x720:
YUYV 1280 720 10.0 YUYV 1280 720 10.0 JeVois PassThrough
Save to JeVois (CTRL-S) and confirm that you can see video after JeVois restarts.
Do this on another machine running JeVois Inventor (or quit your virtualbox first and run JeVois Inventor).
We now turn to these instructions: https://github.com/artoolkit/artoolkit-docs/blob/master/2_Configuration/config_camera_calibration.md
We need to print a calibration chessboard. In the USA, we will use artoolkit5/doc/patterns/Calibration\ chessboard\ (US\ Letter).pdf and an A4 version is also available. You can get those from http://jevois.org/data/artoolkit5-patterns.zip
Make sure you print it at 100% scale.
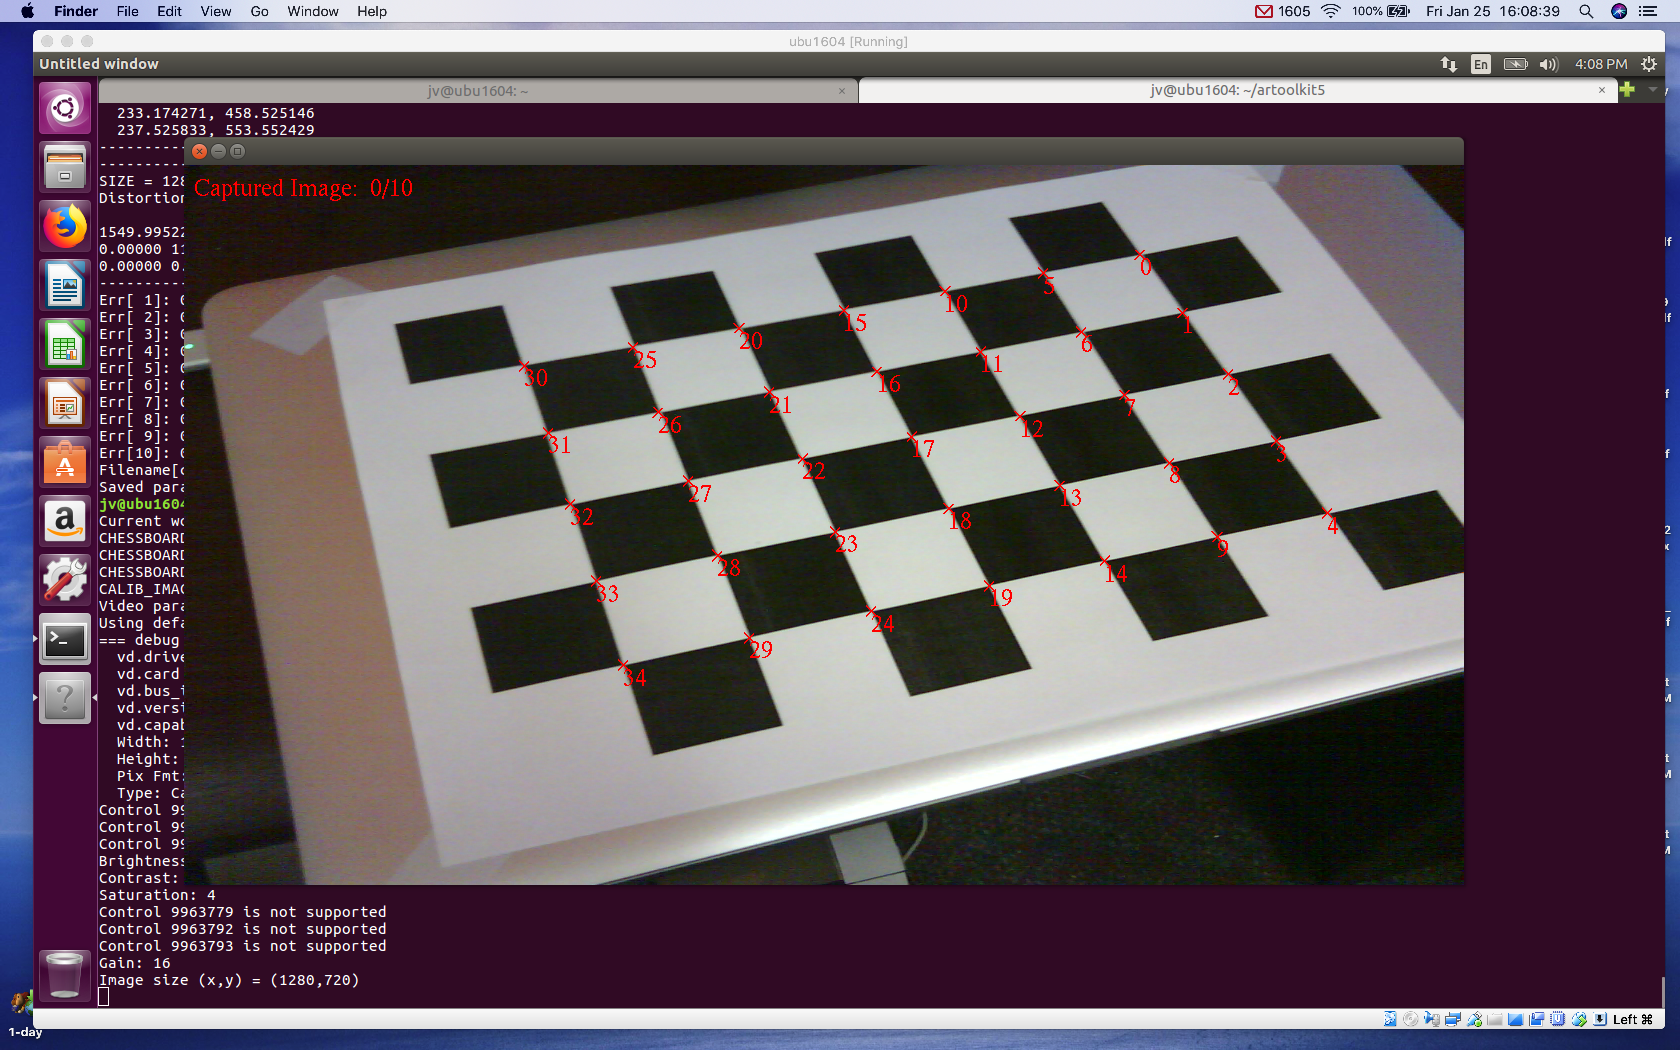
Now back to our VirtualBox, we connect our JeVois camera configured with a single pass-through resolution and start ~/artoolkit5/bin/calib_camera
As instructed in the ARtoolkit calibration docs, tape the pattern down to a flat surface and confirm that each square is exactly 30mm x 30mm.
Then just follow the instructions of the ARToolkit calibration docs (duplicated here for convenience):
Copy the calibration file to JEVOIS:/share/camera/ on your camera, naming it exactly: camera_para1280x720.dat for 1280x720 resolution, or change the name for different resolutions.
Next time you run DemoARtoolkit with that resolution, it will load the calibration file.
 1.9.8
1.9.8