|
JeVois
1.23
JeVois Smart Embedded Machine Vision Toolkit
|
|
|
JeVois
1.23
JeVois Smart Embedded Machine Vision Toolkit
|
|
The sensor in the JeVois smart camera is quite capable, though some adjustments are sometimes necessary to operate well in low light conditions.
These tips are mostly for JeVois-A33, as JeVois-Pro features a high-end Starvis back-illuminated (i.e., extra sensitive) sensor that performs very well in low light. Nevertheless, JeVois-Pro users may still be interested in some of the tips below.
The brightness of the captured video depends on (at least):
By default, JeVois attempts to maintain the frame rate specified in a given video mapping. The rationale for this is that some downstream computer connected to JeVois may require the specified framerate for smooth real-time operation. With some of the machine vision modules bundled with JeVois, the framerate is high, for example 60 frames/s or even 120 frames/s for DemoEyeTracker.
At higher frame rates, there is very little time available for exposure.
Let us compare JeVois-A33 with a professional video camera (Sony FDR-AX1, about 100 times the price of JeVois-A33), and with an inexpensive USB camera (a small bullet camera).
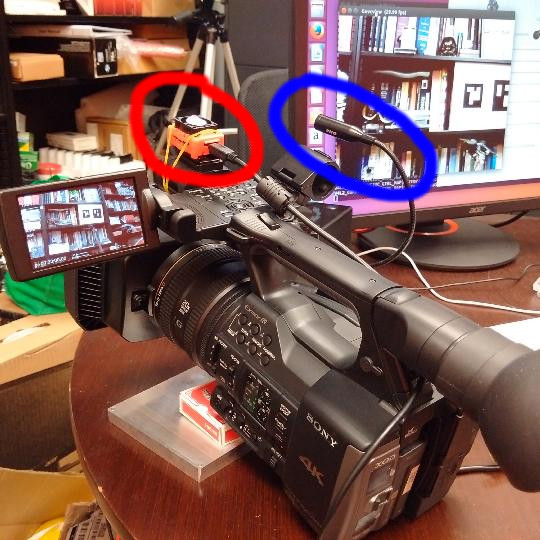
When lighting is low (here, we turned off the light on an evening close to sunset, but not yet past sunset), the image captured by all cameras darkens, as seen below. Here, we can see that the bullet camera adapts by dropping framerate to 4 frames/s to allow for more exposure time (the bullet camera's picture is shown on the computer screen, and guvcview used to display the frames from it reports 4.12 frames/s).
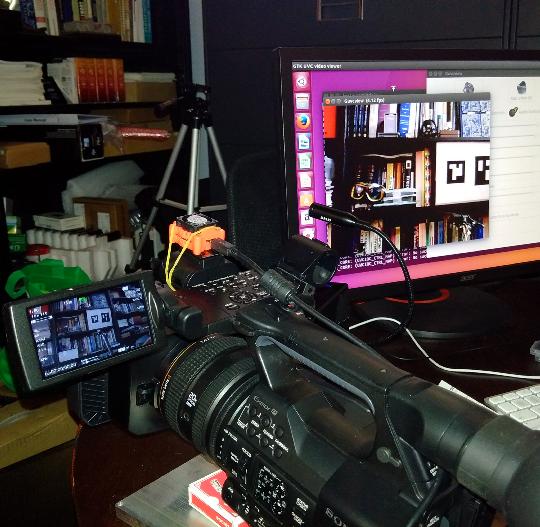
The expensive Sony camera was here set to capture at a fixed 60 fps, and we can see on the little LCD screen of that camera that, despite its much higher cost, that camera too has difficulty producing a bright picture in low light and under high frame rate.
Let us have a closer look at the JeVois camera. With low light, and when using high frame rate, the video can get very, very dark, as shown below.
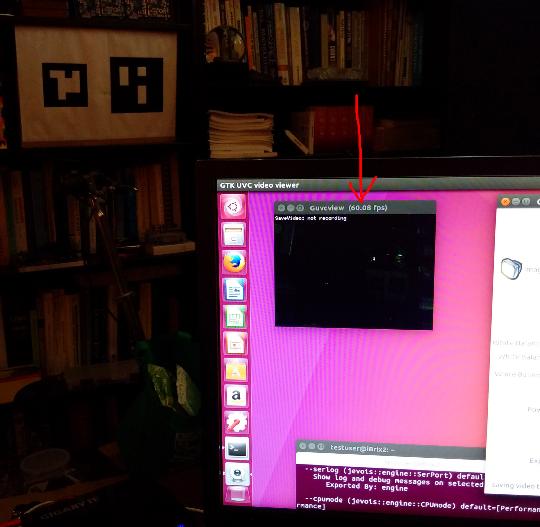
JeVois provides several ways to handle this:
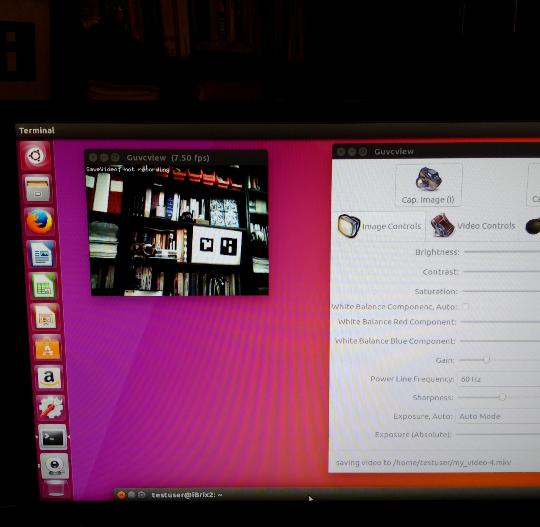
As a first thing to try, JeVois provides standard USB camera controls for brightness, contrast, etc. Those affect the color matrix. You may want to try to play with these controls first in your video capture software, and see whether you can achieve a good enough picture quality under your lighting conditions.
If brightness control is not sufficient, one strategy is to allow for frame rate to decrease when JeVois is used in low light, to allow for longer exposure time. This can be achieved using the presetwb camera parameter available in the JeVois command-line interface (see Command-line interface user guide). Unfortunately, such controls do not seem to exist in the USB Video Class specification, and hence we cannot expose them to the host computer so that they would show up as available controls in the video capture software. Thus, you have to modify these controls using the JeVois command-line interface. Let us switch to night mode (called shade in the Video4Linux2 specifications):
setcam presetwb 9
(available values, as reported by help, are: 0:manual 1:auto 2:incandescent 3:fluorescent 4:fluorescent_h 5:horizon 6:daylight 7:flash 8:cloudy 9:shade).
Feel free to try out the other presets. Preset 9 is the one that allows for the most drastic automatic reduction in frame rate, up to 8x reduction. Some of the other presets allow for only smaller reductions, or for no automatic frame rate adjustment in low light.
In the demos bundled with JeVois, we have often used 60 frames/s to show how fast JeVois can process video on the fly.
However, if you do not need, for example, to detect colorful objects with the ObjectTracker module at 60 frames/s, and your application will work well with 15 frames/s, then just edit the corresponding video mapping and reduce both the USB output frame rate and the camera frame rate in your videomappings.cfg file (see Advanced topic: Video mappings and configuring machine vision modes).
When JeVois starts, it will by default use automatic exposure and gain control, and the lower frame rate will allow a much wider range of automatic exposure and gain adjustments, which in turn will allow JeVois to operate better in low light.
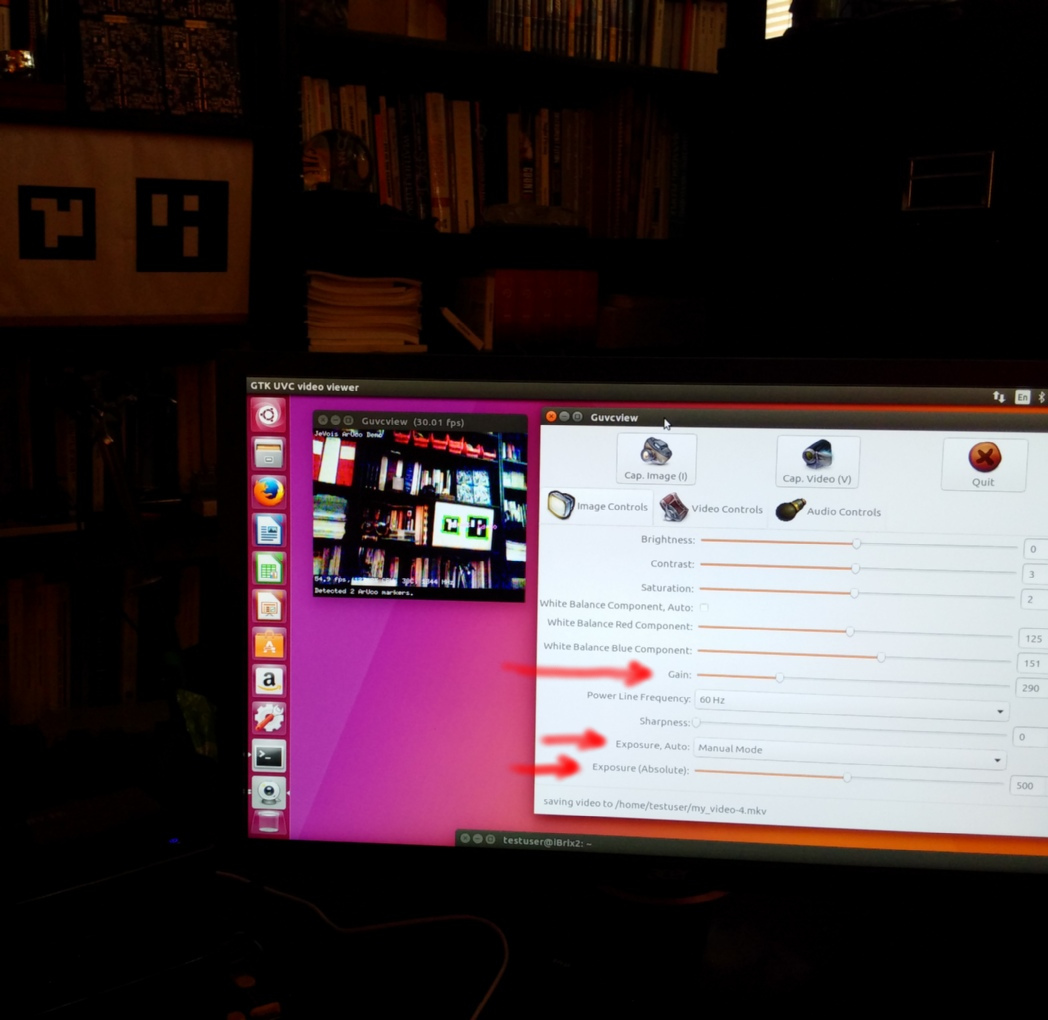
Another option is to turn to manual controls. Two controls are of interest here:
First set the Exposure, Auto control in your video viewer to Manual Mode, and then start setting the Exposure (absolute) and Gain controls. Note that, although the exposure control has a scale from 0 to 1000, only a fraction of that scale may be usable depending on framerate (that is, exposure cannot be increased to a longer time than the frame period. If one attempts to set an exposure time longer than the frame period, exposure will automatically be capped at slightly below the frame period).
Generally speaking, a compromise should be found between gain and exposure values. If motion blur is not a problem, then highest possible exposure and lowest possible gain will yield less noisy and grainy images.
With higher gain, the image will look grainier and, if frame rate must be kept high, will not be pleasant to look at.
But this may not necessarily be a problem for the machine vision algorithms.
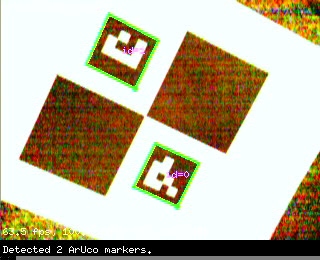
For example, in the image above, we have turned up the gain very high to be able to still operate at 30 frames/s in very dark conditions. Significant pixel noise is apparent in the video captured by JeVois. But ... the DemoArUco algorithm running inside JeVois does not seem to be affected and is running just fine, readily detecting and decoding the two ArUco markers present in the scene!
Here is an even more extreme example, in almost compete darkness and cranking up the exposure and the gain to the max. The image quality is horrible (see the very high pixel noise on the black areas of the markers). But ArUco markers are getting detected just fine...
JeVois allows you to poke at the camera sensor registers through the setcamreg and getcamreg commands (parameter camreg must first be turned to true, as an extra protection against accidental use of these commands). Just beware that changing any register that has to do with pixel clock and details of the image format, polarity of pulses, etc is likely to just crash the sensor and you will have to power JeVois off to recover.
You may want to explore loading different gamma curves, different color matrices, etc into the sensor and see whether you can achieve better low-light performance.
 1.9.8
1.9.8
