Converting and running neural networks for JeVois-Pro NPU
JeVois-Pro includes a 5-TOPS neural processing unit (NPU) that is integrated into the Amlogic A311D processor. This neural accelerator has the fastest connection to the main memory (direct DMA access) and hence data transfers and network execution can be very fast. Also, it does not suffer from having limited on-chip memory like some of the other accelerators do, thus quite large networks can run on the NPU.
Note
JeVois-Pro only. This accelerator is not supported on JeVois-A33.
Supported neural network frameworks
Caffe
TensorFlow
TensorFlow-Lite
ONNX (and pyTorch via conversion to ONNX)
Darknet
Keras
The NPU can run models quantized to uint8, int8, or int16 weights. It does not support float weights and hence quantization and conversion are necessary. A limited number of operations and layer types is supported by the hardware, which further constrains what can run on it. But it is manyfold faster than a standard CPU.
For execution on NPU, your model will be quantized and then converted on a Linux desktop to a proprietary blob format that can then be transferred to JeVois-Pro microSD for execution.
The NPU only supports a specific set of layer types. If you try to convert a network that contains unsupported layers, the conversion may sometimes seem to succeed but your converted network may fail to run. Check the Layer and Operation Support Guide before you attempt to convert a network.
You need to download and install the Amlogic NPU SDK to convert/quantize your model on a desktop computer running Linux Ubuntu 20.04 or later.
Everything you need at runtime (NPU runtime libraries) is pre-installed on your JeVois-Pro microSD.
Obtain a model: train your own, or download a pretrained model.
Obtain some parameters about the model (e.g., pre-processing mean, stdev, scale, expected input image size, RGB or BGR, packed (NWHC) or planar (NCHW) pixels, etc).
Obtain a sample dataset that will be used for quantization, to determine the range of values experienced on each layer of the network during inference, and to set the quantization parameters accordingly. The dataset should be representative, i.e., it should contain the objects you want to detect, along with other things you want to ignore.
Convert and quantize the model using the NPU SDK.
Copy the converted model to JeVois-Pro microSD card under JEVOIS[PRO]:/share/dnn/custom/
Create a JeVois model zoo entry for your model, where you specify the model parameters and the location where you copied your model files. Typically this is a YAML file under JEVOIS[PRO]:/share/dnn/custom/
Launch the JeVois DNN module. It will scan the custom directory for any valid YAML file, and make your model available as one available value for the pipe parameter of the DNN module's Pipeline component. Select that pipe to run your model.
Setting up the NPU SDK
Note
Everything below is to be run on a fast x86_64 desktop computer running Ubuntu 20.04 Linux or later, not on your JeVois-Pro camera. At the end, we will copy the converted model to microSD and then run inference on JeVois-Pro with that model.
The Amlogic/VeriSilicon NPU SDK is distributed by Khadas, which manufactures a development board that uses the same Amlogic A311D processor as JeVois-Pro.
No need to install Ubuntu packages or Python wheels, everything is included in that git repo.
Getting a sample dataset for quantization
To quantize a model, we need to know the expected range of values experienced at each layer of the network. For that, we need a representative sample dataset, which typically would be about 1000 images from your training or validation set. This is very important as it will set the quantization parameters. The images should contain some of the targets you want to detect, and also more things that your camera may see (whether or not you do not want to detect those).
The dataset is just a folder containing some images, plus a text file that contains a list of the image paths, one per line.
If you have retrained the model on a custom dataset, use that dataset instead.
val2017 has 5,000 images which is more than we need. The unix command shuf can randomly shuffle a list of names and take the first n, so let's use it to grab 1000 random images from the dataset. We save a list of those file paths to dataset.txt that will be used for quantization:
ls /path/to/val2017/*.jpg | shuf -n 1000 > dataset.txt
dataset.txt should now contain 1000 lines (your results will vary since shuf is random):
/path/to/val2017/000000382030.jpg
/path/to/val2017/000000436617.jpg
/path/to/val2017/000000138550.jpg
/path/to/val2017/000000226154.jpg
/path/to/val2017/000000319369.jpg
...
you will use this dataset during model conversion.
For best accuracy, we want the quantized network to output separate tensors for class probabilities, bounding box coordinates, segmentation masks, etc. This is because these tensors have very different ranges of values; hence, it is better to quantize each one separately, instead of combining them into one big tensor for post-processing (see Converting and Quantizing Deep Neural Networks for JeVois-Pro for more details).
We provide a script jevoispro-npu-convert.sh to make converting YOLOv8 and later models. It supports all variants: detection, instance segmentation, pose/skeleton, oriented bounding boxes (OBB), and classification. Use it as follows:
1. Get the model and export to ONNX
Here, we just get a standard yolov8n model for example, which we resize to 1024x576 resolution (same aspect ratio as our camera's native video frames). If you have a retrained model, provide its name below instead of yolov8n.pt:
Everything we run here should be from inside aml_npu_sdk/acuity-toolkit/python/
The script just determines the correct output tensors to use for various YOLO variants and various tasks, for compatibility with the JeVois post-processors. It works as follows:
- dataset.txt: a text file containing a list of images to use for quantization. These should be part of the validation
set used to train the model. Typically 1000 images or so. If no dataset file is given, will try to use
dataset-<task>.txt in the current directory.
- iterations: number of images from dataset.txt to use for quantization, or use all if not given.
Note
It is not completely clear from the NPU SDK docs how adding more iterations may improve model accuracy. On your first try converting a model, you may just want to use 1 iteration, which will be fast. Then if the model runs correctly on JeVois-Pro, you can convert it again with more iterations and see whether the accuracy improves.
Set the pipe parameter to NPU:Detect:yolov8n-1024x576-custom
APPROACH 2 (easy): Using the Khadas conversion script
The NPU SDK contains a (closed-source) conversion script that can be used not only for YOLO variants, but for any supported model. See docs on the Khadas web site.
Using the same yolov8n-1024x576-custom.onnx as in approach 1, we can convert the model as follows:
cd aml_npu_sdk/acuity-toolkit/python/
./convert --model-name yolov8n-1024x576-custom \
--platform onnx \
--model yolov8n-1024x576-custom.onnx \
--mean-values '0 0 0 0.00392156' \
--quantized-dtype asymmetric_affine \
--source-files dataset.txt \
--batch-size 1 \
--iterations 1 \
--kboard VIM3 --print-level 1
We obtain 2 results in outputs/yolov8n-1024x576-custom/
libnn_yolov8n-1024x576-custom.so # runtime library for JeVois-Pro that will load the model
yolov8n-1024x576-custom.nb # model weights
For JeVois-Pro to run this model, we need to create a YAML zoo file yolov8n-1024x576-custom.yml as follows:
Set the pipe parameter to NPU:Detect:yolov8n-1024x576-custom
You may want to try the conversion again with more iterations and see whether the resulting model is more accurate.
APPROACH 3 (most step-by-step): Using the NPU SDK conversion scripts
The NPU SDK provides 3 scripts in aml_npu_sdk/acuity-toolkit/demo/ that will need to be edited and then run in sequence on your desktop:
0_import_model.sh: Converts from the source framework (Caffe, TensorFlow, etc) to an intermediate representation, and then computes some stats about the ranges of values encountered on each layer on a sample dataset. These ranges of values will be used to set quantization parameters.
1_quantize_model.sh: Quantize the model using asymmetric affine uint8, or dynamic fixed point int8 or int16. This yields the model that we will run on JeVois-Pro, in a .nb proprietary binary blob format.
2_export_case_code.sh: Creates some C code that can be compiled on a target platform (like JeVois-Pro) to create a standalone app that will load and run the model on one image. We will not use that code since the JeVois software provides its own code that directly links the model to the camera sensor and to the GUI. However, we will inspect it so we can get input and output specifications for our YAML zoo file.
Let's download YOLOv7-tiny which runs on 416x416 inputs. Either click on the latest Release and then on yolov7-tiny.weights in the list of assets at the bottom, or run this:
The file contains various commented out examples for various frameworks. Here we need to:
change the NAME
enable the Darknet blurb, comment out the other frameworks. Note: pegasus is run twice, first for import, and then to generate metadata about the input. We only replace the first one by the framework we want to import from.
(not needed for Darknet, maybe needed for others) set the input-size-list to our input size, which here is 1x3x416x416 accouding to yolov7-tiny.cfg.
we need to know input pre-processing scale, mean, stdev. Tiny YOLO v7 just expects RGB images with pixel values in [0.0 .. 1.0]. Hence we will use mean=[0 0 0], stdev=[1 1 1], scale=1/255=0.0039215686, rgb=true.
Below, channel-mean-value expects 4 values: 3 means for 3 color channels, and 1 scale.
Do not cut and paste the '# JEVOIS edited' comments above, they will break the code, remove them.
Run it, it should complete with no errors:
./0_import_model.sh
You can check out yolov7-tiny_inputmeta.yml for a description of the input parameters, and yolov7-tiny.json for a description of the model graph.
If this steps yields errors, maybe some operations are not supported, which may happen towards the end of the network. In such case, examine the network in Netron and look at which layer failed to convert, then add a parameter for –outputs /some/layer to truncate the network to that layer.
So we enable that and also change the model NAME, end up with this modified 1_quantize_model.sh:
#!/bin/bash
NAME=yolov7-tiny # JEVOIS edited
ACUITY_PATH=../bin/
pegasus=${ACUITY_PATH}pegasus
if [ ! -e "$pegasus" ]; then
pegasus=${ACUITY_PATH}pegasus.py
fi
$pegasus quantize \
--quantizer asymmetric_affine \ # JEVOIS edited
--qtype uint8 \ # JEVOIS edited
--rebuild \
--with-input-meta ${NAME}_inputmeta.yml \
--model ${NAME}.json \
--model-data ${NAME}.data
Run it, it should complete with no errors:
./1_quantize_model.sh
You can check out yolov7-tiny.quantize to see the min/max value range for each layer on the sample dataset, and how every layer was accordingly quantized. This file will be deleted when the next script runs.
5. Edit and run 2_export_case_code.sh
Here, we just need to set the model NAME, and also select the correct NPU model, which for the A311D processor in JeVois-Pro is VIPNANOQI_PID0X88. We end up with:
All right, everything we need is in yolov7-tiny_nbg_unify/
Converted model: yolov7-tiny.nb
C code: vnn_yolov7tiny.c which we will inspect to derive our input and output tensor specifications.
6. Create YAML zoo file
We start with the YoloV4 entry from zoo file /jevoispro/share/dnn/npu.yml already in the JeVois microSD (and available in the Config tab of the GUI).
To get the specs of the quantized input and outputs, we inspect yolov7-tiny_nbg_unify/vnn_yolov7tiny.c and look for tensor definitions. We find this (comments added to explain the next step):
In the YAML file below, we will split this list by YOLO scales (here, the 9 w,h pairs correspond to 3 pairs each for 3 scales. We separate scales by semicolon below).
Because YOLOv7 uses the "new style" of YOLO coordinates, we need to disable Post-Processor sigmoid and set Post-Processor scalexy to 2.0. You would want that for YOLOv5/v7, and set sigmoid to true and scalexy to 0.0 to use old-style box coordinates for YOLOv2/v3/v4. You can look at the differences in jevois::dnn::PostProcessorDetectYOLO::yolo_one()
We just modify the name and file locations, bring all the global definitions into our file (like preproc, nettype, etc which were set globally in npu.yml and hence not repeated for the YoloV4 entry we are copying from), and end up with the following yolov7-tiny.yml (pre-processor mean and scale are as we used them in 0_import_model.sh):
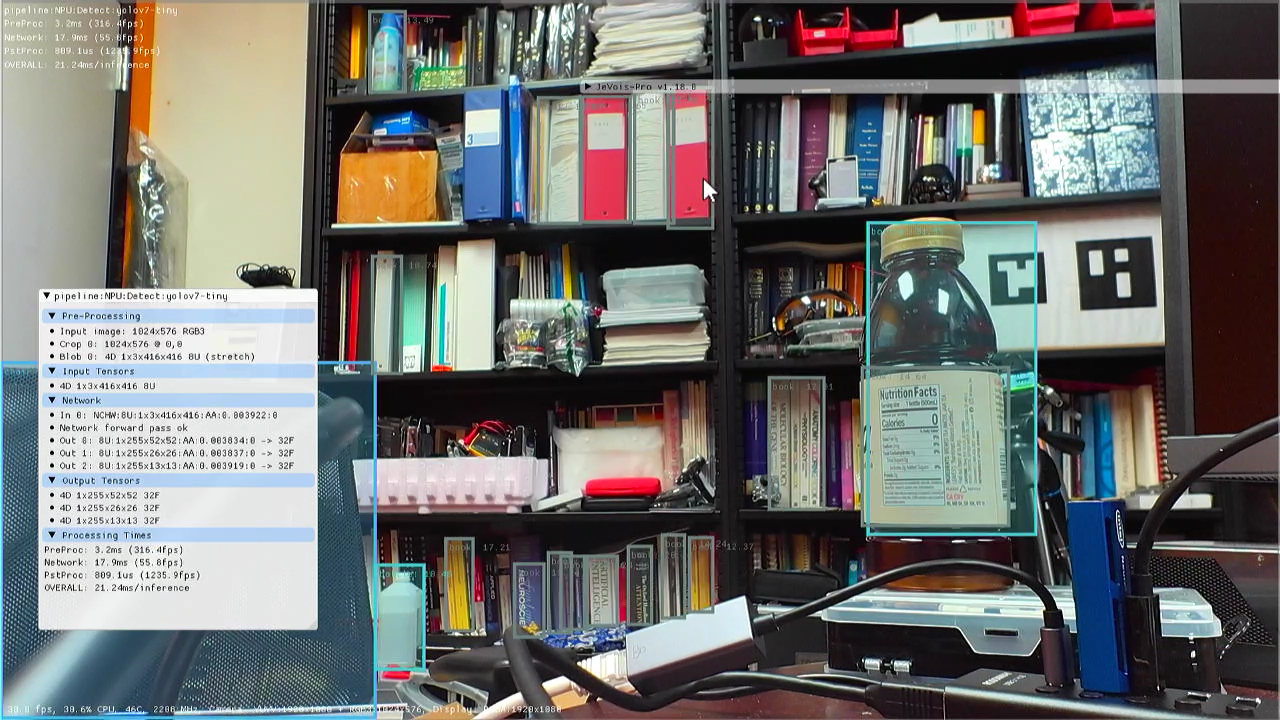
It works! Quite fast too, around 55 fps for the network inference only (the part that runs on NPU).
Note
You can repeat this tutorial using int8-DFP quantization instead in 1_quantize_model.sh. You then only need to change the intensors and outtensors specs in your YAML to the obtained DFP parameters. We did it, and the network is running fine, but about half the speed (about 22.5 fps). So AA quantization is the way to go with this network.
Tips
If you get a "Graph verification failed" when you try to run your network, maybe you entered the tensor specifications incorrectly. Under the Config tab of the GUI you can edit your yolov7-tiny.yml and fix it.
Khadas has their own docs which you may want to check out since their VIM3 board uses the same Amlogic A311D processor as JeVois-Pro. But note that on JeVois we skip using the generated C code as JeVois-Pro already provides all the code we need to run NPU models.
When converting from pyTorch, if you get some strange error like
RuntimeError: [enforce fail at inline_container.cc:208] . file not found: archive/constants.pkl
maybe your model was saved with a version of pyTorch more recent than the one included in the NPU SDK. You may need to save your model to ONNX instead, and then try to convert again from ONNX. Or it might be that the model uses layer types or operations that the NPU does not support, in which case converting to ONNX will not help. You would need to change your network to only include layers and operations that can be mapped to NPU.
Note
Thus far, we have not been able to successfully convert directly from pyTorch using the NPU SDK, we always get some kind of error. But first exporting the source model to ONNX and then running the NPU SDK on that works fine, as long as only NPU-supported operations are used in the source model.
Go through their installation steps, including creating a conda environment and getting all dependencies.
You can also retrain on a custom dataset at this stage.
To export to ONNX, using opset 13 gave some conversion errors, so we used opset 12. We can also set a custom image resolution in that step using imgsz parameter:
Some layers towards the end of the network were giving size errors, maybe because of the different opset. In any case, we wanted the raw YOLO output. Thus, we inspected the network in Netron and decided to use /model.23/Transpose_output_0 as output layer in 0_import_model.sh:
# ...
#Onnx
$pegasus import onnx\
--model ${NAME}.onnx \
--output-model ${NAME}.json \
--outputs /model.23/Transpose_output_0 \
--output-data ${NAME}.data
# ...
It converted fine. However, it was not generating any boxes on the display. Upon inspection of the output tensor, confidence values for all classes were always zero. Looking at the yolov10n-512x288.quantize generated during conversion showed a range of [-108.24 .. 611.29] for the values in the output tensor. Indeed, in that output tensor, which is 1x3024x84 for inputs 1x3x288x512, both 4 box coordinates (which can vary within 512x288, and more in case boxes partially go outside the input image), and 80 class confidences (in [0..1]), were concatenated. That means that with 8 bits of quantization, any class confidence in [0..1] would always map to the same number (the zero-point of quantization):
0 quantized maps to -108.24 dequantized
1 quantized maps to -105.43 dequantized (quantization step is (611.29+108.24)/256 = 2.81)
...
255 quantized maps to 611.29 dequantized
So with a quantization step of 2.81, we cannot discriminate values in the [0..1] range.
So we changed the quantization to dynamic_fixed_point and int16. The results used 5 bits for the decimal portion, which should be enough to represent class accuracies reasonably well. Another approach, which we use for YOLOv8 and later, is to output separate tensors for class probabilities and bounding boxes. This is what we did in Approach 1 and Approach 2.
This worked well, and YOLOv10n for NPU now included in the JeVois distribution and microSD image.
However, a 16-bit quantized model is slower than 8-bit quantized. This is why we now prefer to output raw tensors before concatenation, as we have done above in Approach 1 above.
 1.9.8
1.9.8
