Ubuntu tip
On Ubuntu, to prevent Nautilus from opening 3 windows each time you insert a JeVois microSD card (which gets annoying after a while), type this in a terminal:
gsettings set org.gnome.desktop.media-handling automount-open false
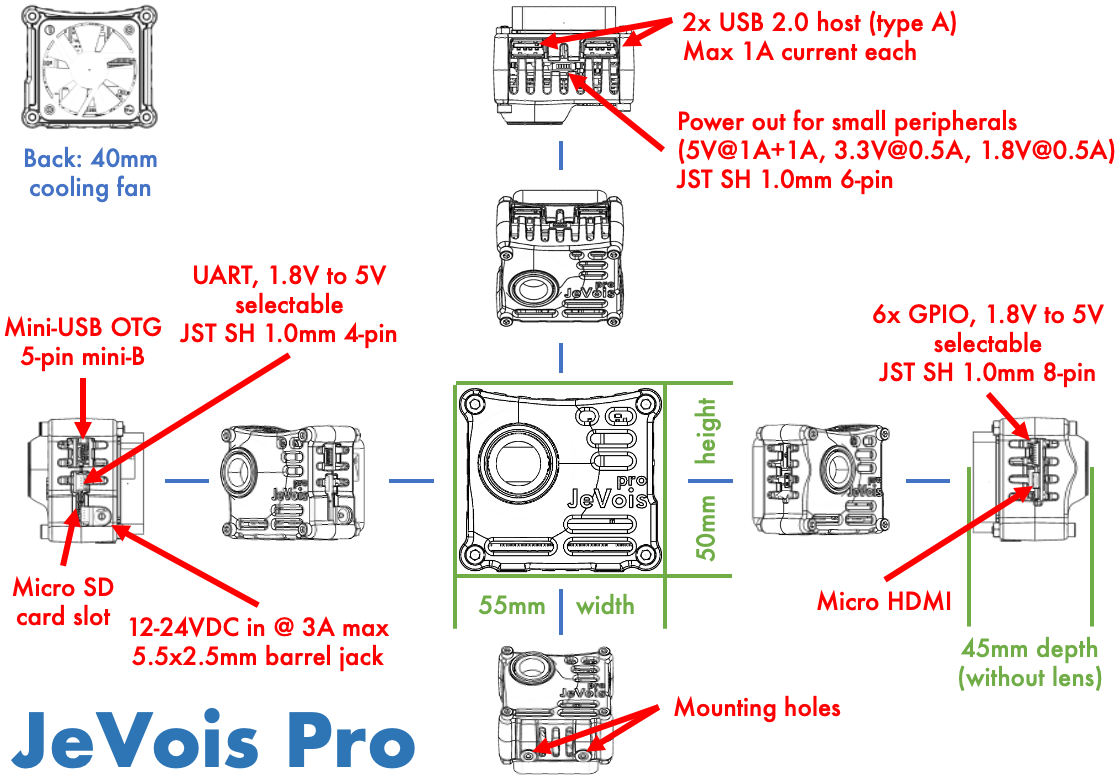
Congratulations on getting a JeVois=Pro smart camera. The future of machine vision now lies on your hands. Please take a moment to familiarize yourself with the external features of your JeVois-Pro smart camera.
If you have received a MicroSD card with all JeVois-Pro software pre-loaded, advance to Safe Handling and Inserting the MicroSD card.
All the operating system and machine vision software for JeVois-Pro resides on a MicroSD card that you insert directly into the smart camera. Download the pre-packaged JeVois-Pro MicroSD card image. This is for cards at least 64GB in size.
The JeVois disk image is a raw, sector-by-sector dump of the whole MicroSD card. Flash it to the physical MicroSD as you would with any raw disk image.
On Ubuntu, to prevent Nautilus from opening 3 windows each time you insert a JeVois microSD card (which gets annoying after a while), type this in a terminal:
gsettings set org.gnome.desktop.media-handling automount-open false
Perhaps the easiest is to use the free program Etcher from balena.io, as follows:
Download and install the free and open-source Etcher program. We have cached versions here:
Etcher 1.5.18 Windows x64 Etcher 1.5.18 Linux x64 Etcher 1.5.18 MacOS
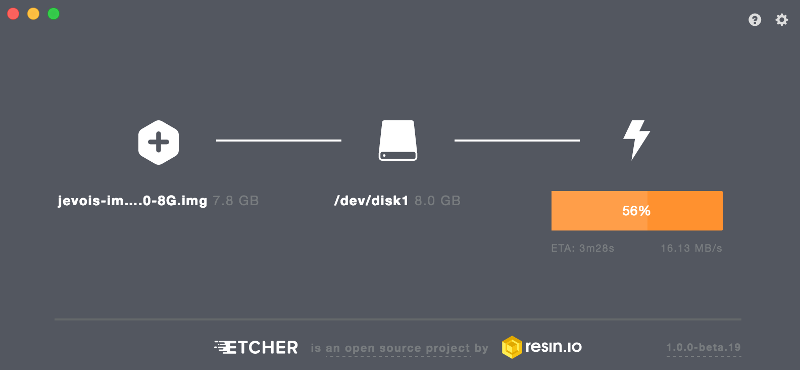
If needed, you can also see detailed instructions here.
Always observe these safe handling instructions:

JeVois-Pro is a sensitive high-technology device. Make sure you handle it with care and be especially mindful of protecting the cooling fan and allowing good airflow that is essential for operation.
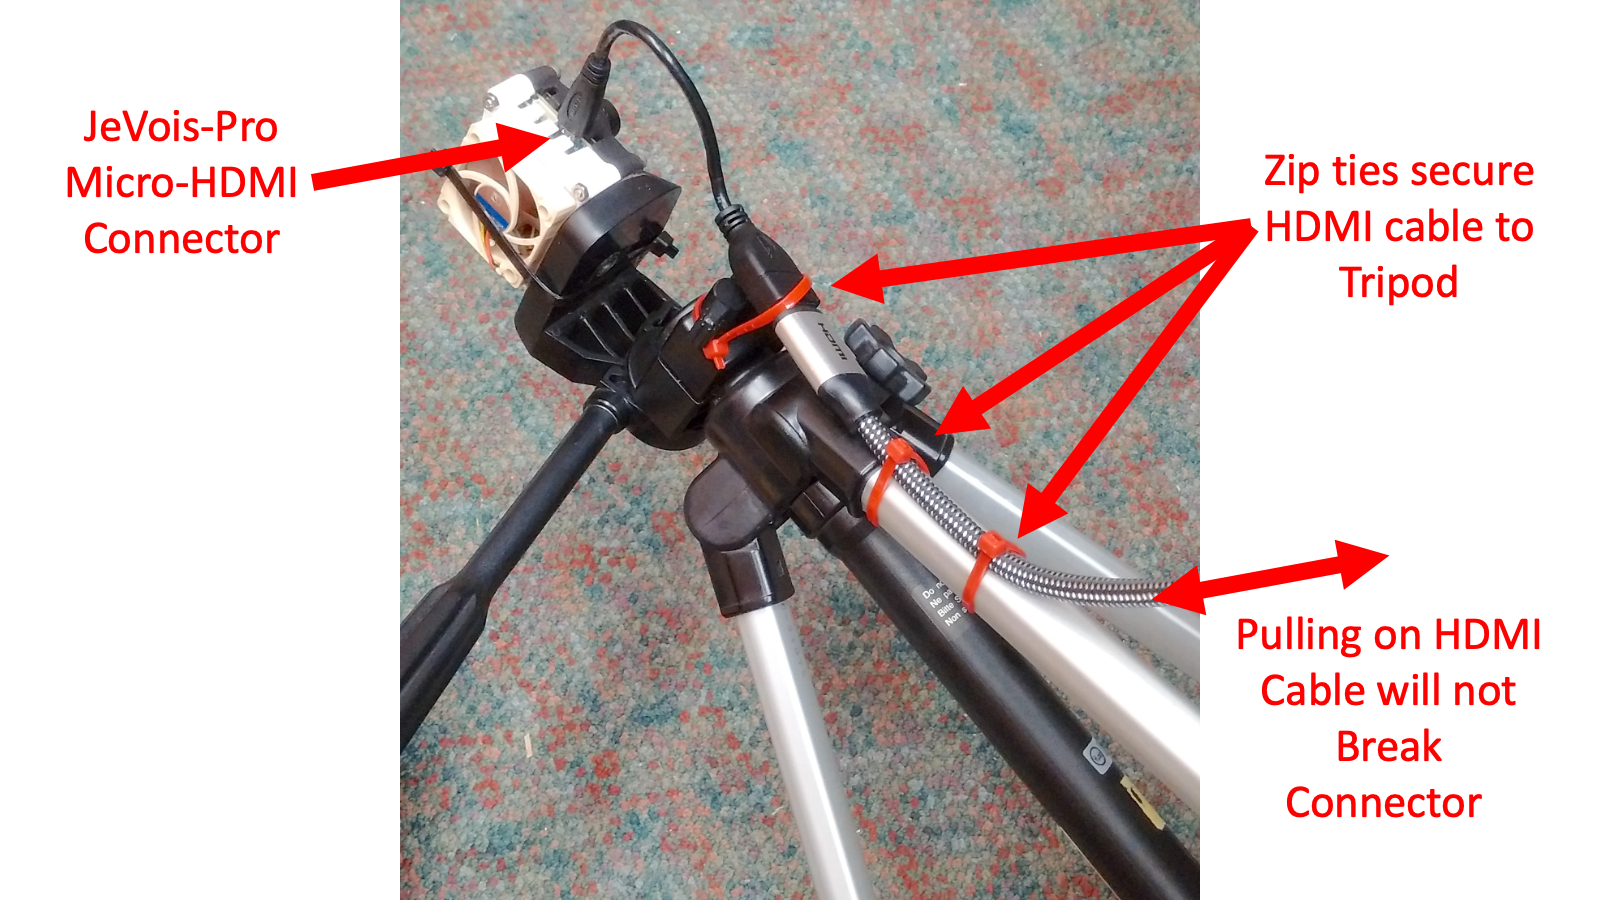
The connectors on JeVois-Pro are fragile and are not designed for mechanical stress. This is especially true for the micro-HDMI connector. If you rip or bend it, it will be nearly impossible to replace (it has 2 rows of pins with pitch 0.4mm, one of which is completely under the connector body). Be sure to provide strain relief when mounting JeVois-Pro on a mobile platform. For example, use zip ties to secure the HDMI cable to the platform onto which JeVois-Pro is mounted, so that when the platform moves there is no force applied to the connector.
See the photograph below for an example where JeVois-Pro is mounted on a tripod. To avoid stress on the micro-HDMI connector, we secured the HDMI cable to the tripod using zip ties. This way, pulling on the HDMI cable will not stress the micro-HDMI connector.
Insert the MicroSD card as shown here:
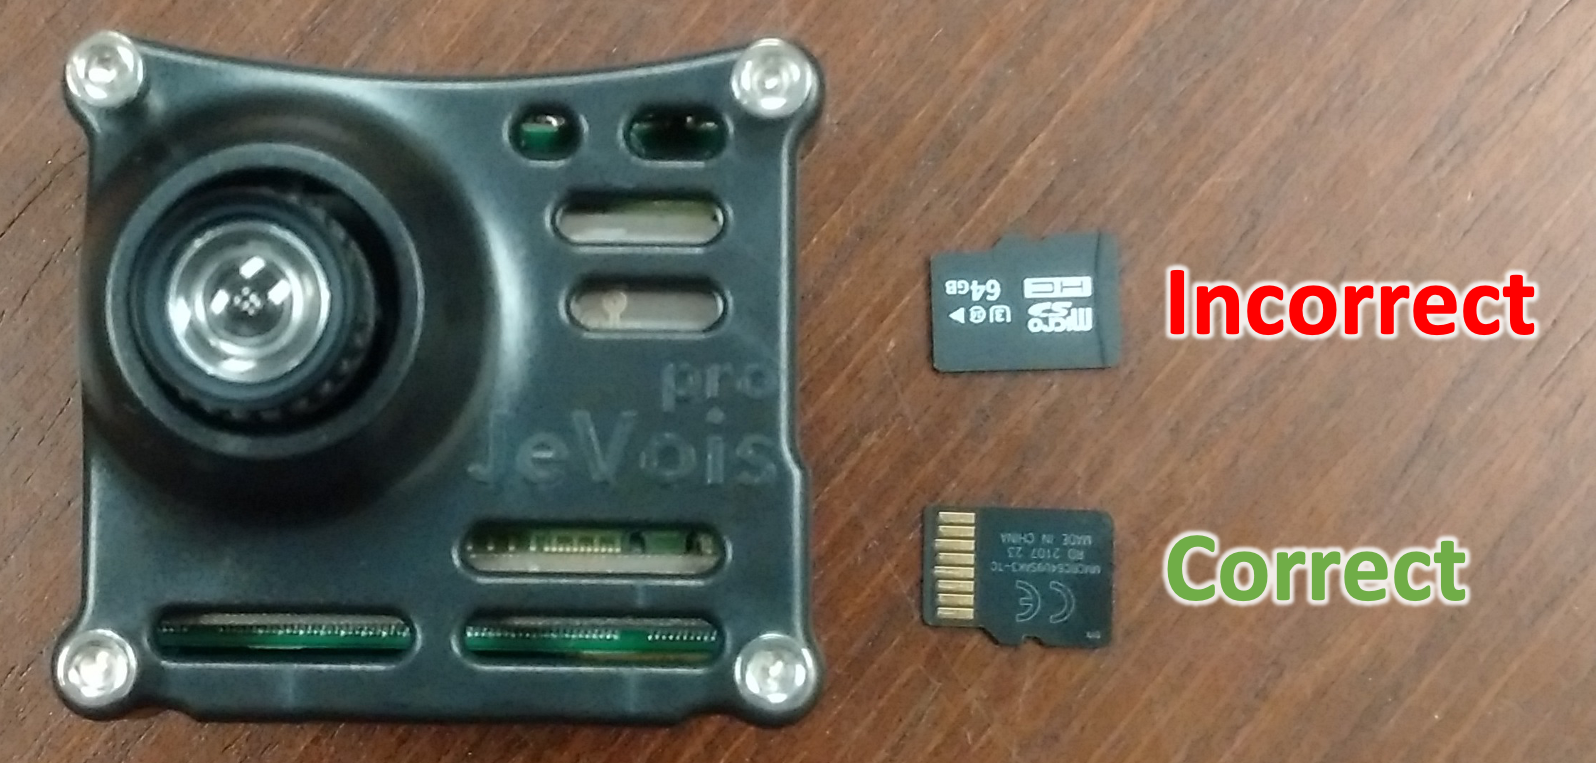
Your JeVois smart camera features a push-push MicroSD card slot: Push until it clicks to insert it, push again until it clicks to eject it. Never try to pull on the MicroSD card. When properly inserted, your MicroSD card should not stick out of the JeVois case, but should be completely in, about 1.5mm or 1/16" past the edge of the mini-USB connector.
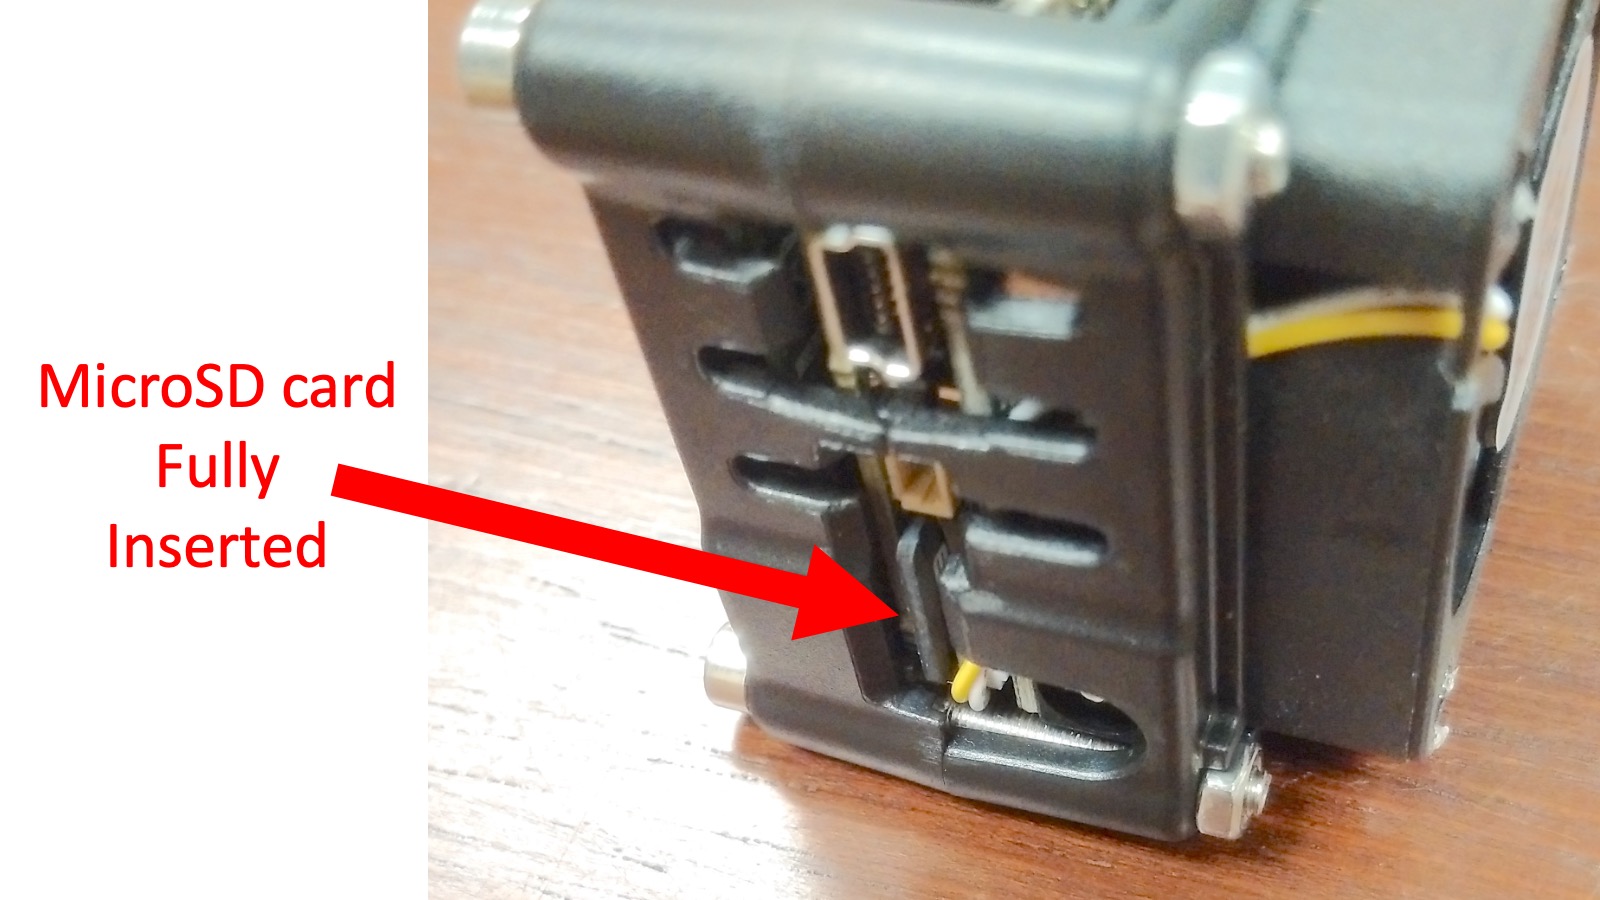
Some MicroSD cards are a bit thicker than others, and will not fully eject. In this case, first push on the card until it sticks out of the case by a few millimeters, then carefully pull it out with tweezers.
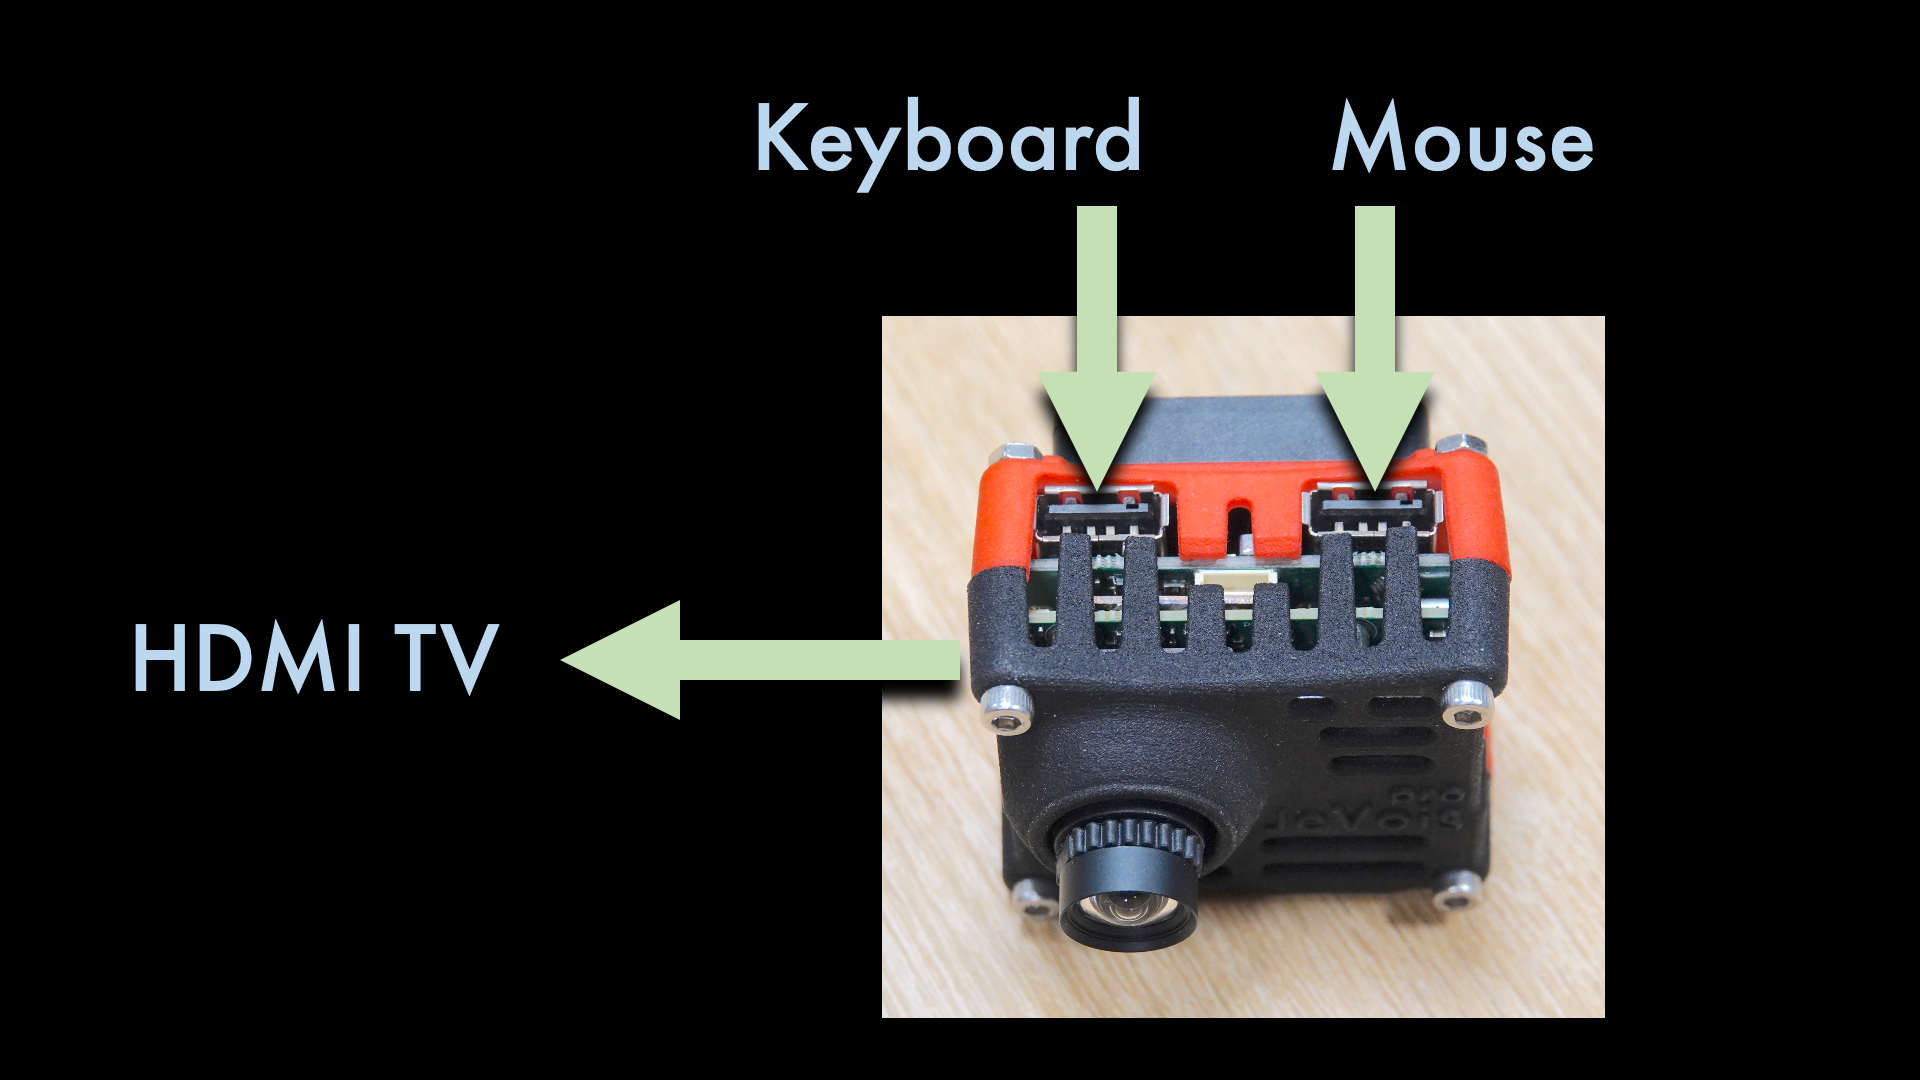
Connect JeVois-Pro to an HDMI monitor or TV (must be able to display 1080p/60Hz), USB keyboard, USB mouse, and finally to power, and enjoy!
Want to discover what your new JeVois smart camera is capable of? Our guided tour will walk you through many of its available machine vision modules, from simple edge detection, to QR-code decoding, to detecting and recognizing objects in complex scenes.
| Download Guided Tour |  |
Try it out with your kids!
Many machine vision algorithms are included and ready to run from the MicroSD card image.
See http://jevois.org/doc/ProUserQuick.html for some tips.
Just email us at jevoisinc@gmail.com and we will help you!
See the master documentation for JeVois at http://jevois.org/doc/ for more information.