JeVois Tutorials  1.21
JeVois Smart Embedded Machine Vision Tutorials
 
Share this page:
Loading...
Searching...
No Matches
JeVois python tutorial: A dice counting module

Here we develop a simple Python+OpenCV vision module that counts the total number of pips on some dice presented to JeVois. This application scenario was suggested by JeVois user mapembert at the JeVois Tech Zone in this post:

http://jevois.org/qa/index.php?qa=328

In this tutorial, you will learn:

  • how to create a new Python machine vision module for JeVois from scratch
  • how to implement the dice counting algorithm in Python
  • how to install the new module to live microSD

This tutorial assumes JeVois v1.3 or later.

See A JeVois dice counting module in C++ for an implementation of this algorithm in C++ OpenCV (Linux host only).

Preliminaries

  • Review Programming a live JeVois camera using Python so that you are comfortable with:
    • Flashing the latest microSD image to a physical card
    • Connecting JeVois to a host computer and powering it up
    • Grabbing video from JeVois and selecting different resolutions
    • Communicating with JeVois using a serial-over-USB link, and using the JeVois command-line interface
    • Exporting the microSD inside JeVois to your host computer
    • Editing Python code live on the microSD inside JeVois

Setting up a new Python module

The easiest to get started is to grab a copy of the samplepythonmodule in the JeVois github https://github.com/jevois/samplepythonmodule:

  • Windows and Mac users: get a copy of the samplepythonmodule repository from the above URL. You would essentially do something akin to:
      git clone https://github.com/jevois/samplepythonmodule.git
    After this, you should:
    • Rename the directory samplepythonmodule to pythondicecounter
    • Edit CMakeLists.txt to change module name and vendor name
    • rename src/Modules/SamplePythonModule to src/Modules/PythonDiceCounter
    • change the class name in src/Modules/PythonDiceCounter/PythonDiceCounter.py to PythonDiceCounter
  • Linux: If you have installed the jevois-sdk and followed the instructions in Setting up for programming JeVois, you should instead use the script jevois-create-python-module which will grab that same sample code from GitHub, and will also immediately change names of classes and files to match our new module's name: usage is jevois-create-python-module <VendorName> <ModuleName>, so here let us just run:
      cd
      jevois-create-python-module Tutorial PythonDiceCounter
    you should now have the following:
      pythondicecounter
      ├── CMakeLists.txt
      ├── COPYING
      ├── INSTALL
      ├── README.md
      ├── rebuild-host.sh
      ├── rebuild-platform.sh
      └── src
          └── Modules
              └── PythonDiceCounter
                  ├── postinstall
                  └── PythonDiceCounter.py
Note
Vision modules written in Python do not need to be compiled. The CMakeLists.txt is here to assist with:
  • installing to a live microSD card inside JeVois
  • generating online documentation
  • creating a jvpkg package with the module that can be given to friends to try out by simply copying the package to JEVOIS:/packages/ on the microSD of JeVois. Next time JeVois restarts, it will unpack the jvpkg file and install the package.

The algorithm

The author of the original module mentioned in the above post, Yohann Payet, sent us his code, which is written in C++ and as follows (this is standalone code not intended for operation on JeVois; in this tutorial we will convert it to Python and adapt it for use in JeVois):

// Created by Yohann Payet (mechanical/embedded systems engineer)
// Using opencv,c++
// Contact Y.Payet@hotmail.com
#include "opencv2/highgui/highgui.hpp"
#include "opencv2/imgproc/imgproc.hpp"
#include "opencv2/features2d.hpp"
#include <iostream>
int main() {
cv::Mat im_with_keypoints; std::vector<cv::KeyPoint> keypoints;
cv::Mat grayImage, camFrame, kernel;
int morphBNo2 = 2;
char str[200];
//Setting detector parameters
cv::SimpleBlobDetector::Params params;
params.filterByCircularity = true;
params.filterByArea = true;
params.minArea = 200.0f;
//Creating a detector object
cv::Ptr<cv::SimpleBlobDetector> detector = cv::SimpleBlobDetector::create(params);
//video capture settings
cv::VideoCapture cap(1); // open the default camera
cap.set(CV_CAP_PROP_FRAME_WIDTH, 640);
cap.set(CV_CAP_PROP_FRAME_HEIGHT, 480);
//checking video stream
if (!cap.isOpened()) { // check if we succeeded
std::cout << ("Failure to open camera") << "\n";
std::cin.get();
}
else {
for (;;) {
// get a new frame from camera
cap >> camFrame;
//converting video to single channel grayscale
cv::cvtColor(camFrame, grayImage, CV_BGR2GRAY);
grayImage.convertTo(grayImage, CV_8U);
//filter noise
cv::GaussianBlur(grayImage, grayImage, cvSize(5, 5), 0, 0);
//apply automatic threshold
cv::threshold(grayImage, grayImage, 0.0, 255, cv::THRESH_BINARY_INV | cv::THRESH_OTSU);
//background area
cv::dilate(grayImage, grayImage, kernel, cv::Point(-1, -1), morphBNo2);
cv::Mat image(grayImage.rows, grayImage.cols, CV_8U, cv::Scalar(255, 255, 255));
cv::Mat invBack2 = image - grayImage;
//blob detection
detector->detect(invBack2, keypoints);
int nrOfBlobs = keypoints.size();
// draw keypoints
cv::drawKeypoints(camFrame, keypoints, im_with_keypoints, cv::Scalar(0, 0, 255),
cv::DrawMatchesFlags::DRAW_RICH_KEYPOINTS);
//text only appears if at least 1 blob is detected
if (nrOfBlobs >0 ) {
sprintf(str, "total pips: %d ", nrOfBlobs);
cv::putText(im_with_keypoints, str, cv::Point2f(10, 25), cv::FONT_HERSHEY_PLAIN,
2, cv::Scalar(0, 255, 255, 255));
}
//show image
imshow("keypoints", im_with_keypoints);
std::cout << "number of pips: " << nrOfBlobs << std::endl;
//hit esc to quit
if (cv::waitKey(1) == 27) break;
}
}
return 0 ;
}
int main(int argc, char const *argv[])

Our tasks now are:

  • Convert the C++ calls to OpenCV functions to Python calls
  • Use the JeVois input frames as opposed to an OpenCV video capture object
  • Send result images to the host computer over USB using the JeVois framework as opposed to displaying them using OpenCV HighGUI

Deciding on capture and output resolutions

This algorithm was written for 640x480 resolution. Let us use that in our module as well. We edit ~/pythondicecounter/src/Modules/PythonDiceCounter/postinstall as follows:

jevois-add-videomapping YUYV 640 480 22 YUYV 640 480 22 Tutorial PythonDiceCounter

The postinstall script will be run by the JeVois camera after we install our new module to microSD. The video mapping required by our module and defined in postinstall will then be added to the main videomappings.cfg file on the microSD. Note that postinstall applies to the platform hardware only. To add the videomapping to your host configuration, just run the above command on your host computer (using sudo).

Note how here we have chosen 22 frames/s as our initial guess for framerate. Because 640x480 is a popular resolution, this will also allow us to avoid clashes with other modules that use this same resolution but rates of 30 frames/s or others. We will adjust this rate later once we know how fast this algorithm runs on JeVois.

Initial import to live microSD

The JeVois samplepythonmodule runs fine out of the box and thus our module should run as well if we have not introduced any mistakes.

  • On Mac and Windows:
    • Create a directory JEVOIS:/modules/Tutorial on the microSD for our new vendor name Tutorial
    • Create a directory JEVOIS:/modules/Tutorial/PythonDiceCounter on the microSD for our new module
    • Copy files postinstall and PythonDiceCounter.py from pythondicecounter/src/Modules/PythonDiceCounter/ to JEVOIS:/modules/Tutorial/PythonDiceCounter/ on the microSD
  • On Linux: This has been automated through CMake, just connect JeVois and let it boot, then type:

      cd ~/pythondicecounter
      ./rebuild-platform.sh --live

    Which will instruct JeVois to export its microSD as a virtual flash drive to the host computer, will copy the required files, and will eject the drive to reboot JeVois. The module will be ready for use once JeVois has restarted.

    You should see an output like this:

    itti@iLab1:~/pythondicecounter$   ./rebuild-platform.sh --live
    [sudo] password for itti: 
    -- JeVois version 1.2.3
    -- JEVOIS_PLATFORM: ON
    -- JEVOIS_VENDOR: Tutorial
    -- JeVois microSD card mount point: /media/itti/JEVOIS
    -- JeVois serial-over-USB device: /dev/ttyACM0
    -- JEVOIS_MODULES_TO_STAGING: OFF
    -- JEVOIS_MODULES_TO_MICROSD: OFF
    -- JEVOIS_MODULES_TO_LIVE: ON
    -- Install prefix for executable programs: /var/lib/jevois-build/usr
    -- Host path to jevois modules root: /var/lib/jevois-microsd
    -- The C compiler identification is GNU 6.1.0
    -- The CXX compiler identification is GNU 6.1.0
    -- Check for working C compiler: /lab/itti/jevois/software/jevois-sdk/out/sun8iw5p1/linux/common/buildroot/host/usr/bin/arm-buildroot-linux-gnueabihf-gcc
    -- Check for working C compiler: /lab/itti/jevois/software/jevois-sdk/out/sun8iw5p1/linux/common/buildroot/host/usr/bin/arm-buildroot-linux-gnueabihf-gcc -- works
    -- Detecting C compiler ABI info
    -- Detecting C compiler ABI info - done
    -- Detecting C compile features
    -- Detecting C compile features - done
    -- Check for working CXX compiler: /lab/itti/jevois/software/jevois-sdk/out/sun8iw5p1/linux/common/buildroot/host/usr/bin/arm-buildroot-linux-gnueabihf-g++
    -- Check for working CXX compiler: /lab/itti/jevois/software/jevois-sdk/out/sun8iw5p1/linux/common/buildroot/host/usr/bin/arm-buildroot-linux-gnueabihf-g++ -- works
    -- Detecting CXX compiler ABI info
    -- Detecting CXX compiler ABI info - done
    -- Detecting CXX compile features
    -- Detecting CXX compile features - done
    -- JeVois SDK root: /lab/itti/jevois/software/jevois-sdk
    -- Adding setup directives for Python module PythonDiceCounter base src/Modules
    -- Configuring done
    -- Generating done
    -- Build files have been written to: /lab/itti/pythondicecounter/pbuild
    Scanning dependencies of target modinfo_PythonDiceCounter
    [100%] Generating ../src/Modules/PythonDiceCounter/modinfo.yaml, ../src/Modules/PythonDiceCounter/modinfo.html
    [100%] Built target modinfo_PythonDiceCounter
    [100%] Built target modinfo_PythonDiceCounter
    Install the project...
    -- Install configuration: ""
    JeVois smart camera virtual USB ready at /media/itti/JEVOIS
    -- Installing: /media/itti/JEVOIS/modules/Tutorial/PythonDiceCounter
    -- Installing: /media/itti/JEVOIS/modules/Tutorial/PythonDiceCounter/postinstall
    -- Installing: /media/itti/JEVOIS/modules/Tutorial/PythonDiceCounter/PythonDiceCounter.py
    JeVois smart camera virtual USB disk ejected -- rebooting JeVois
    

Trying out the initial sample module

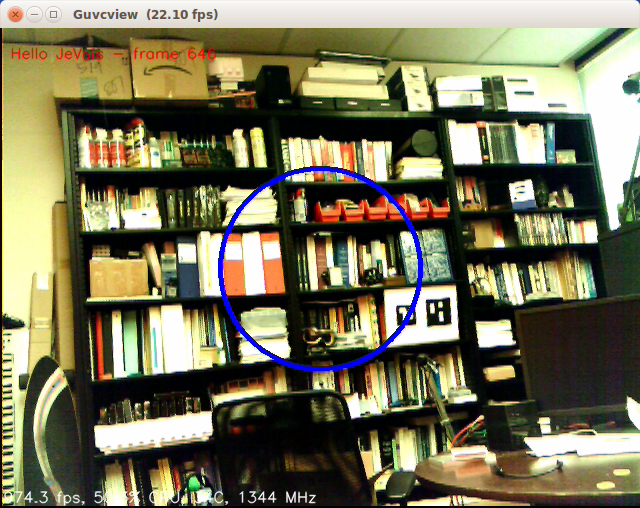
Fire up your video capture software and set it to 640x480 @ 22fps. You should see the sample python module running, but under our new name:
Implementing the module

From here on, we have two basic methods to implement the module:

  • edit PythonDiceCounter.py on the host computer, and once in a while, copy it to live JeVois microSD
  • edit it directly on the live microSD

In both cases, we will use the usbsd JeVois command to export the microSD inside JeVois as a virtual flash drive, as detailed in user tutorial Live access to contents of the microSD inside JeVois and as done in programmer tutorial Programming a live JeVois camera using Python

Let us convert that C++ code to Python. A quick web search for 'python SimpleBlobDetector' reveals the following great tutorials that will help us with the translation:

When in doubt, we also just search the web; for example, to find out how to translate cv::GaussianBlur(...) to Python, we just search for cv2.GaussianBlur to find out the python syntax.

Here is our first attempt:

import libjevois as jevois
import cv2
import numpy as np
## Count the number of pips on dice seen by JeVois
#
# This module can help you automate counting your dice values, for example when playing games that involve throwing
# multiple dice.
#
# @author Laurent Itti
#
# @videomapping YUYV 640 480 22.0 YUYV 640 480 22.0 JeVois PythonDiceCounter
# @email itti\@usc.edu
# @address University of Southern California, HNB-07A, 3641 Watt Way, Los Angeles, CA 90089-2520, USA
# @copyright Copyright (C) 2017 by Laurent Itti, iLab and the University of Southern California
# @mainurl http://jevois.org
# @supporturl http://jevois.org/doc
# @otherurl http://iLab.usc.edu
# @license GPL v3
# @distribution Unrestricted
# @restrictions None
# @ingroup modules
class PythonDiceCounter:
# ###################################################################################################
## Constructor
def __init__(self):
self.morphBNo2 = 2
# Instantiate a JeVois Timer to measure our processing framerate:
self.timer = jevois.Timer("dice", 50, jevois.LOG_DEBUG)
# Instantiate a circular blob detector:
params = cv2.SimpleBlobDetector_Params()
params.filterByCircularity = True
params.filterByArea = True
params.minArea = 200.0
self.detector = cv2.SimpleBlobDetector_create(params)
# Create a morpho kernel (this was not in the original code?)
self.kernel = np.ones((5,5), np.uint8)
# ###################################################################################################
## Process function with no USB output
#def processNoUSB(self, inframe):
# jevois.LFATAL("process no usb not implemented")
# ###################################################################################################
## Process function with USB output
def process(self, inframe, outframe):
# Get the next camera image (may block until it is captured) and convert it to OpenCV BGR (for color output):
img = inframe.getCvBGR()
# Also convert it to grayscale for processing:
grayImage = cv2.cvtColor(img, cv2.CV_BGR2GRAY)
# Get image width, height:
height, width = grayImage.shape
# Start measuring image processing time (NOTE: does not account for input conversion time):
self.timer.start()
# filter noise
grayImage = cv2.GaussianBlur(grayImage, (5, 5), 0, 0);
# apply automatic threshold
grayImage = cv2.threshold(grayImage, 0.0, 255, cv2.THRESH_BINARY_INV | cv2.THRESH_OTSU)
# background area
grayImage = cv2.dilate(grayImage, self.kernel, (-1, -1), self.morphBNo2)
invBack2 = 255 - grayImage
# blob detection
keypoints = self.detector.detect(invBack2)
nrOfBlobs = keypoints.shape()
# draw keypoints
im_with_keypoints = cv2.drawKeypoints(img, keypoints, np.array([]), (0, 0, 255),
cv2.DRAW_MATCHES_FLAGS_DRAW_RICH_KEYPOINTS)
# text only appears if at least 1 blob is detected
if nrOfBlobs > 0:
cv2.putText(im_with_keypoints, "total pips: {}".format(nrOfBlobs), (10, 25), cv2.FONT_HERSHEY_PLAIN,
2, (0, 255, 255, 255))
# Write frames/s info from our timer (NOTE: does not account for output conversion time):
fps = self.timer.stop()
cv2.putText(im_with_keypoints, fps, (3, height - 6), cv2.FONT_HERSHEY_SIMPLEX, 0.5,
(255,255,255), 1, cv2.LINE_AA)
# Convert our BGR image to video output format and send to host over USB:
outframe.sendCvBGR(im_with_keypoints)

Let us try it by opening our video capture software, and we see some issues with that code:
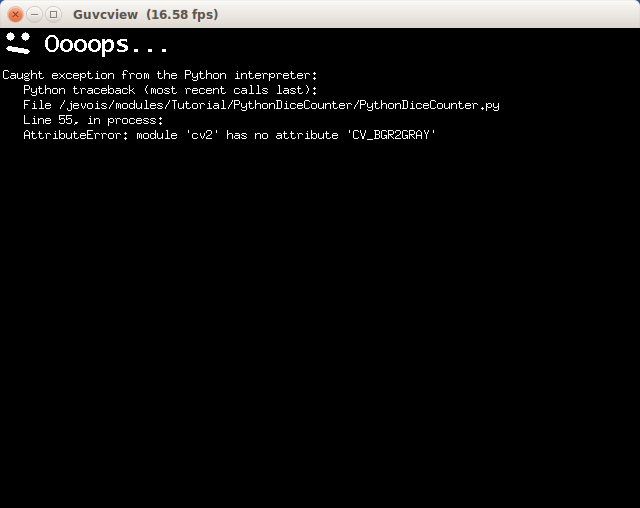
There were a number of additional translation bugs in the above code, which we easily detect and fix using the JeVois video error messages as shown in the above image. Perhaps the most difficult to debug was to use a + operator to combine flags in the cv2..threshold() call instead of the | operator of C++, as well as noting how cv2.threshold() has two return values.

Result

The final code after debugging is:

import libjevois as jevois
import cv2
import numpy as np
## Count the number of pips on dice seen by JeVois
#
# This module can help you automate counting your dice values, for example when playing games that involve throwing
# multiple dice.
#
# @author Laurent Itti
#
# @videomapping YUYV 640 480 22.0 YUYV 640 480 22.0 JeVois PythonDiceCounter
# @email itti\@usc.edu
# @address University of Southern California, HNB-07A, 3641 Watt Way, Los Angeles, CA 90089-2520, USA
# @copyright Copyright (C) 2017 by Laurent Itti, iLab and the University of Southern California
# @mainurl http://jevois.org
# @supporturl http://jevois.org/doc
# @otherurl http://iLab.usc.edu
# @license GPL v3
# @distribution Unrestricted
# @restrictions None
# @ingroup modules
class PythonDiceCounter:
# ###################################################################################################
## Constructor
def __init__(self):
self.morphBNo2 = 2
# Instantiate a JeVois Timer to measure our processing framerate:
self.timer = jevois.Timer("dice", 50, jevois.LOG_DEBUG)
# Instantiate a circular blob detector:
params = cv2.SimpleBlobDetector_Params()
params.filterByCircularity = True
params.filterByArea = True
params.minArea = 200.0
self.detector = cv2.SimpleBlobDetector_create(params)
# Create a morpho kernel (this was not in the original code?)
self.kernel = np.ones((5,5), np.uint8)
# ###################################################################################################
## Process function with no USB output
#def processNoUSB(self, inframe):
# jevois.LFATAL("process no usb not implemented")
# ###################################################################################################
## Process function with USB output
def process(self, inframe, outframe):
# Get the next camera image (may block until it is captured) and convert it to OpenCV BGR (for color output):
img = inframe.getCvBGR()
# Also convert it to grayscale for processing:
grayImage = cv2.cvtColor(img, cv2.COLOR_BGR2GRAY)
# Get image width, height:
height, width = grayImage.shape
# Start measuring image processing time (NOTE: does not account for input conversion time):
self.timer.start()
# filter noise
grayImage = cv2.GaussianBlur(grayImage, (5, 5), 0, 0)
# apply automatic threshold
ret, grayImage = cv2.threshold(grayImage, 0, 255, cv2.THRESH_BINARY_INV + cv2.THRESH_OTSU)
# background area
grayImage = cv2.dilate(grayImage, self.kernel, iterations = 1) #self.morphBNo2)
invBack2 = 255 - grayImage
# blob detection
keypoints = self.detector.detect(invBack2)
nrOfBlobs = len(keypoints)
# draw keypoints
im_with_keypoints = cv2.drawKeypoints(img, keypoints, np.array([]), (255, 0, 0),
cv2.DRAW_MATCHES_FLAGS_DRAW_RICH_KEYPOINTS)
# text only appears if at least 1 blob is detected
if nrOfBlobs > 0:
cv2.putText(im_with_keypoints, "total pips: {}".format(nrOfBlobs), (10, 25), cv2.FONT_HERSHEY_PLAIN,
2, (0, 255, 255, 255))
# Write frames/s info from our timer (NOTE: does not account for output conversion time):
fps = self.timer.stop()
cv2.putText(im_with_keypoints, fps, (3, height - 6), cv2.FONT_HERSHEY_SIMPLEX, 0.5,
(255,255,255), 1, cv2.LINE_AA)
# Convert our BGR image to video output format and send to host over USB:
outframe.sendCvBGR(im_with_keypoints)

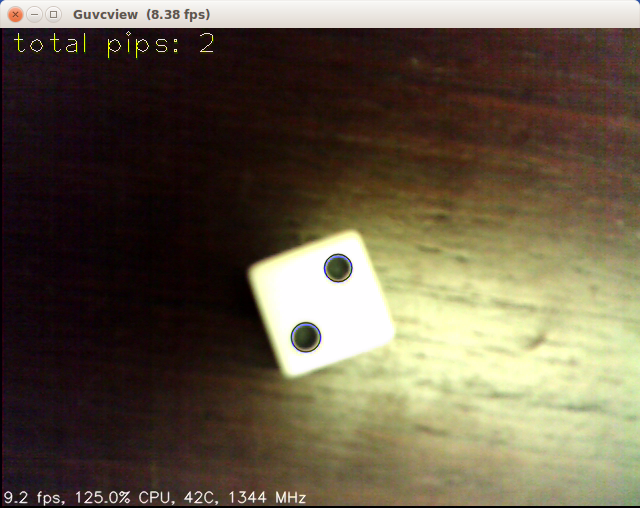
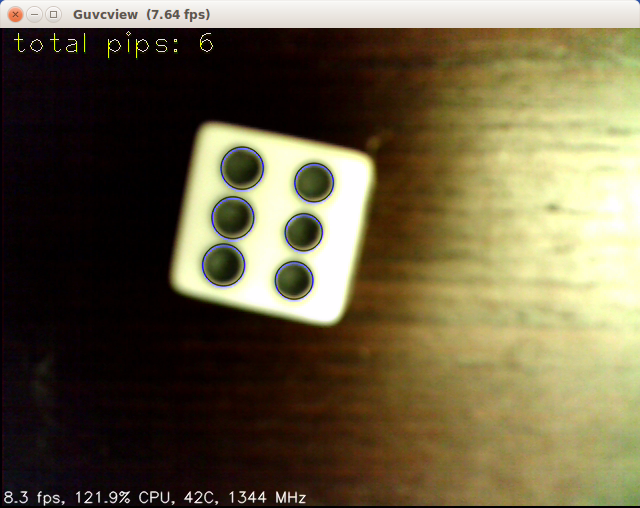
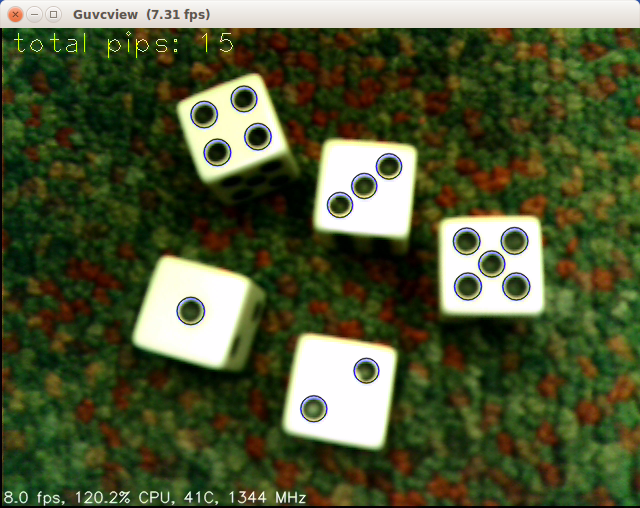
which yields results like:

Note that this algorithm runs a bit slow on JeVois, about 8 frames/s. One could adjust the videomapping accordingly.

It is likely that we could make it run faster, especially by implementing this module directly in C++. We would:

  • eliminate the conversion from input YUYV to BGR and from output BGR to YUYV by directly copying the input YUYV frame to the output YUYV frame, and using JeVois drawing functions that can operate on YUYV images instead of the OpenCV functions.
  • Hence, do only on eimage conversion from YUYV to GRAY for processing.
  • Parallelize processing of the gray image and copying the YUYV image from camera to USB.

Packing the module

If you are using a Linux host and have been developing the code by editing the Python file on your host and then running ./rebuild-platform.sh --live to install it to a live JeVois camera for debugging, you can now type:

./rebuild-platform.sh

Which installs instead to a directory jvpkg in your module:

-- Installing: /lab/itti/pythondicecounter/jvpkg/modules/Tutorial/PythonDiceCounter
-- Installing: /lab/itti/pythondicecounter/jvpkg/modules/Tutorial/PythonDiceCounter/postinstall
-- Installing: /lab/itti/pythondicecounter/jvpkg/modules/Tutorial/PythonDiceCounter/PythonDiceCounter.py

You would then finally type:

cd pbuild
make jvpkg

which creates ~/pythondicecounter/Tutorial_pythondicecounter.jvpkg

You can send that file to your friends, and tell them to copy it to JEVOIS:/packages/ on their microSD. Next time JeVois restarts, it will unpack, install, configure, and delete the package, and the new module will be ready for use.