|
JeVois Tutorials
1.23
JeVois Smart Embedded Machine Vision Tutorials
|

|
|

Loading...
Searching...
No Matches
|
JeVois Tutorials
1.23
JeVois Smart Embedded Machine Vision Tutorials
|
|
|
Camera calibration consists of determining essential parameters of the optics and of the sensor. Once a precise calibration is achieved, modules such as DemoArUco, FirstVision, FirstPython, and PythonObject6D can recover the exact location and orientation of a marker or object in 3D space.
JeVois includes a set of default calibration files for the standard sensor and optics.
You should consider running a calibration if:
Note that calibration is dependent on image resolution. So the procedure described here should be repeated for every video resolution which you intend to use.
Start with a fresh Ubuntu 18.04 virtualbox.
Follow the instructions at http://jevois.org/doc/Virtualbox.html but with Ubuntu 18.04. Beware: you may have problems compiling ARtoolkit with later versions of Ubuntu.
Make sure you reboot your host and install the USB device filter. You should get to the point where you can see video in guvcview when you connect your JeVois camera.
We will compile the OpenCV calibration code natively in our virtual machine.
We follow the instructions at http://jevois.org/basedoc/ArUco_8H_source.html except that we will just use the default OpenCV that comes with Ubuntu as opposed to using the JeVois OpenCV.
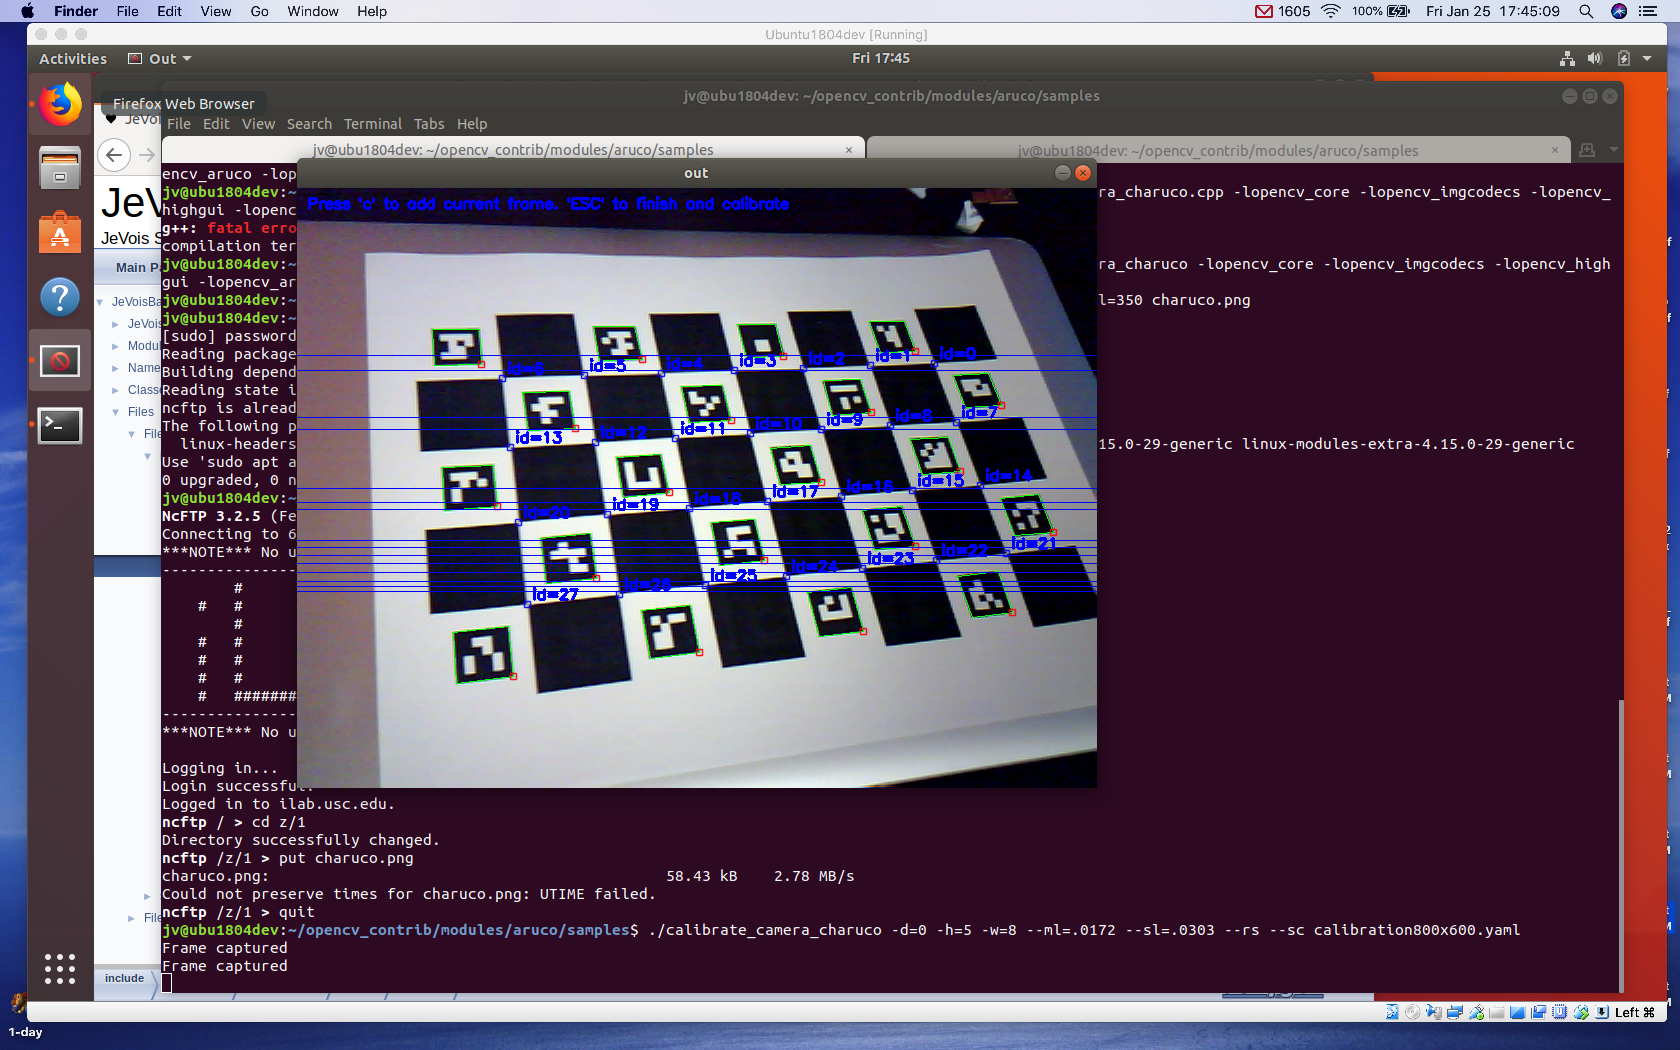
The program we will use should now be ready in bin/calib_camera
The camera calibration will just select the default video mode from the camera.
To make sure the particular resolution is selected, edit videomappings.cfg on your JeVois camera to have only one mode. For example, using JeVois Inventor, go to the Config tab and select videomappings.cfg, then select all (CTRL-A) and delete (DEL) and finally just add one Pass Through mode. For example, to calibrate a modified JeVois camera using an optional 2MP OV2640 sensor at 1280x720:
YUYV 1280 720 10.0 YUYV 1280 720 10.0 JeVois PassThrough
Save to JeVois (CTRL-S) and confirm that you can see video after JeVois restarts.
Do this on another machine running JeVois Inventor (or quit your virtualbox first and run JeVois Inventor).
Now back to our VirtualBox, first create an array of ArUco markers (a so-called ChArUco):
Then print it (you may have to first use scp, ftp, or other to send the file from your virtualbox to a computer that has a printer – or just get it from http://jevois.org/data/charuco.png instead), measure the marker size and spacing size (in whatever units you want, here we use meters, just make sure you will use that same unit later when you specify marker size in DemoArUco and others).
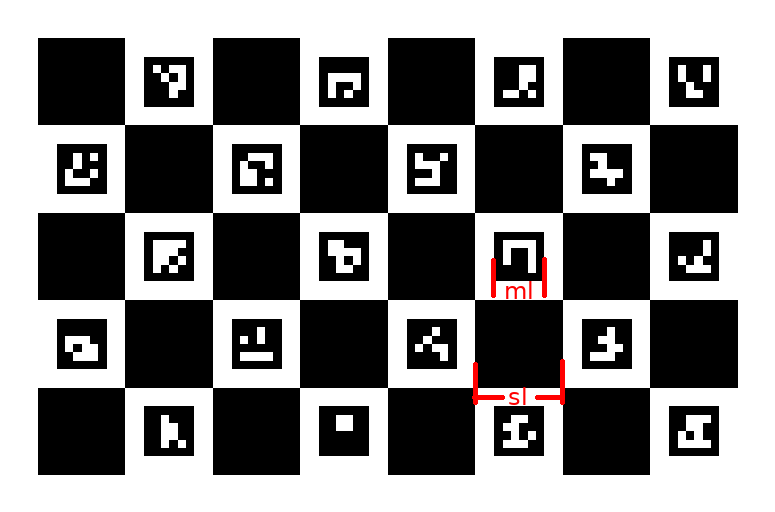
Finally, derive the camera parameters from it (set the --ml and --sl parameters to what you measure on your printed board; below are what we measured after printing the 5x8 charuco board on US Letter paper with auto scaling/rotate to fit paper):
Copy the calibration file to JEVOIS:/share/camera/ on your camera, naming it exactly: calibration1280x720.yaml for 1280x720 resolution, or change the name for different resolutions.
Next time you run DemoArUco with that resolution, it will load the calibration file.
 1.9.8
1.9.8